Private Label, White Label, Wholesale partnerships available - EU, USA and UK - Free shipping from €75
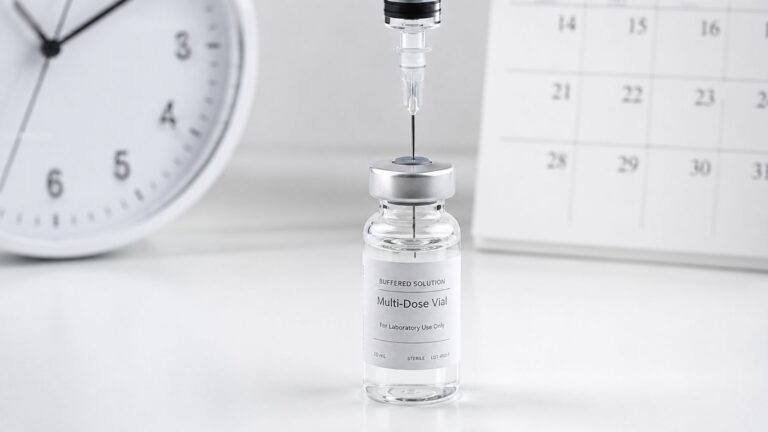
Lab Reagent Handling Steps for Safe, Accurate Research
Master the essential lab reagent handling steps to ensure safety and accuracy in your research. Follow our guide for best practices!
TL;DR:
- Proper handling of lab reagents begins with reviewing the SDS, verifying PPE, and confirming labware calibration before opening any containers.
- Using new sterile tips, pipetting vertically with controlled immersion, and sealing containers immediately are essential for accuracy and contamination prevention.
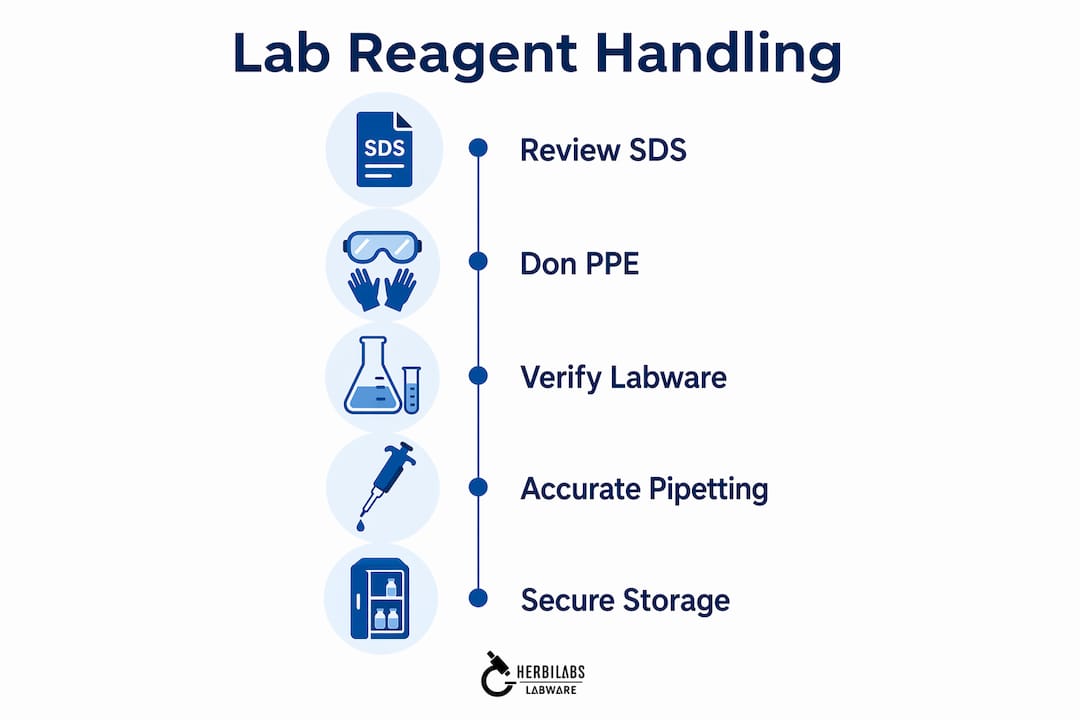
Lab reagent handling steps are defined as the sequential procedural actions laboratory personnel must follow to safely receive, prepare, use, and store chemical reagents while preventing contamination, exposure, and experimental error. Executed correctly, these steps protect both the researcher and the integrity of the data. A single deviation, such as reusing a pipette tip or skipping a Safety Data Sheet review, can compromise an entire assay series. This guide covers the full laboratory reagent protocol from pre-handling preparation through post-use storage, with specific technique guidance for pipetting, segregation, and reagent grade selection.
What equipment and preparation are essential before handling lab reagents?
Preparation is the most frequently skipped phase of the reagent handling workflow, and it accounts for a disproportionate share of lab accidents and assay failures. Before any container is opened, the correct Personal Protective Equipment (PPE) must be in place. At minimum, this means nitrile gloves, chemical splash goggles, and a lab coat. For volatile or acutely toxic compounds, a half-face respirator with appropriate cartridges and a certified fume hood are required.
Calibrated pipettes are non-negotiable for any quantitative work. A pipette delivering 2% above its stated volume will skew molarity calculations, dilution series, and dose-response curves. Verify calibration records before each session, and use only manufacturer-approved tips for your specific pipette model. Labware selection also matters: volumetric flasks, graduated cylinders, and microcentrifuge tubes must be rated for the chemical class you are handling.
Reviewing the SDS before reagent handling is a regulatory and practical requirement. The SDS specifies flash points, incompatible materials, first-aid measures, and required ventilation. This information directly determines your workspace setup, including whether a standard bench, a fume hood, or a biosafety cabinet is appropriate.
- PPE checklist: nitrile or neoprene gloves, chemical splash goggles, lab coat, closed-toe shoes, and respirator where indicated
- Labware checklist: calibrated pipettes with correct tips, volumetric glassware, reagent-grade containers, and secondary containment trays
- Workspace checklist: clean bench surface, fume hood certified and tested, spill kit accessible, waste containers labeled and positioned
- Documentation checklist: SDS reviewed, reagent labels verified for grade and expiry, lot numbers recorded in the lab notebook
Modern labs increasingly use RFID inventory systems to track reagent location, lot number, and expiry status. RFID can scan up to 400 inventory tags per second, reducing manual log times from minutes to seconds. This level of traceability eliminates the common error of unknowingly pulling an expired reagent from a shared storage cabinet.
Pro Tip: Set up your workspace in a defined sequence before every session: PPE on, SDS reviewed, labware verified, fume hood running. Treating this as a fixed pre-handling ritual prevents the most common preparatory omissions.
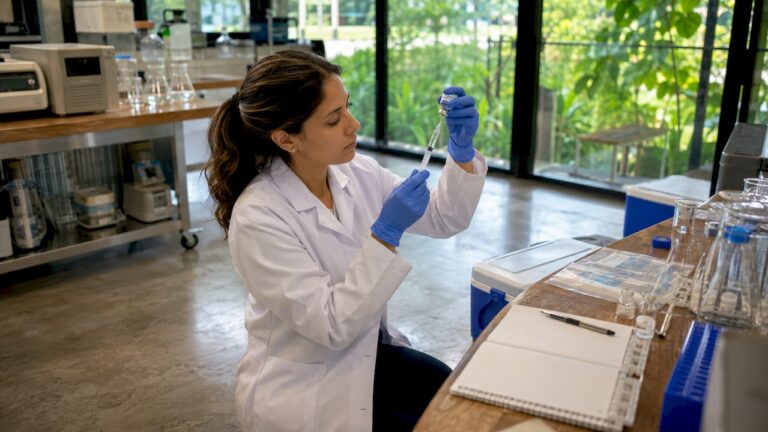
Step-by-step best practices for handling chemical reagents safely and accurately
The following sequence reflects established chemical handling procedures for general analytical and research reagents. Adapt specific steps for your reagent class based on SDS guidance.
-
Verify the reagent label and lot number. Confirm the chemical name, grade, concentration, and expiry date before opening. Cross-reference with your experimental protocol to confirm the correct grade is in hand. Using ACS Reagent grade when Analytical Reagent grade is specified, or vice versa, introduces unnecessary variability.
-
Open the container in the appropriate containment zone. Volatile reagents open inside a running fume hood. Non-volatile aqueous solutions may be opened on a clean bench with secondary containment in place. Never open reagent containers near open flames, incompatible chemicals, or unprotected personnel.
-
Adjust your pipette volume correctly. To avoid mechanical backlash, dial the volume above your target value first, then dial down to the precise setting. This approach, described in pipetting best practices, eliminates the slack in the plunger mechanism that causes volume inaccuracies.
-
Attach a new sterile tip for each reagent and each sample. Using new sterile tips per transfer is the single most effective action for preventing carry-over contamination. Tip reuse between reagents is a primary cause of assay variability in multi-reagent workflows.
-
Pipette at a vertical angle with controlled immersion depth. Hold the pipette vertically or within 20 degrees of vertical. Immerse the tip 2 to 3 mm into the liquid for standard volumes, and up to 6 mm for larger volumes. Angled pipetting draws air into the tip and delivers less than the set volume.
-
Dispense with a slow, controlled plunger depression. Rapid plunger release creates aerosols and inaccurate delivery. Depress to the first stop to aspirate, then depress fully to the second stop (blowout position) when dispensing into the target vessel. Touch the tip to the inner wall of the receiving vessel to release the last drop cleanly.
-
Handle viscous or sensitive reagents with adjusted technique. Viscous reagents such as glycerol or polyethylene glycol require pre-wetting the tip by aspirating and dispensing the reagent once before the actual transfer. Photosensitive reagents must be handled under amber lighting or wrapped in foil immediately after opening.
-
Seal the reagent container immediately after use. Do not leave reagent containers open on the bench. Exposure to ambient air introduces moisture, CO2, and particulate contamination. For hygroscopic reagents like anhydrous salts, even brief exposure degrades purity.
-
Record the volume used, lot number, and time of use. This documentation supports reproducibility and enables troubleshooting if results are inconsistent. Lot-to-lot variation in commercial reagents is a documented source of assay drift, and tracking lot numbers is the only way to correlate performance changes with reagent batches.
-
Dispose of or return the reagent according to your lab’s chemical management protocol. Reagents returned to storage must be re-labeled if the original label is damaged. Waste reagents go into the designated waste stream for their chemical class, never down the drain unless explicitly permitted by your institution’s waste management policy.
Pro Tip: For detergent-based reagents such as Triton X-100 or Tween 20, do not sterile filter after formulation. Micelles trap in filters, altering the effective concentration and producing inconsistent downstream results.
How to properly store and maintain lab reagents after handling
Post-handling storage is where reagent integrity is most often lost. Proper storage separates incompatible chemicals, controls temperature and light exposure, and maintains correct labeling with hazard warnings. These are not optional practices. They are the minimum standard for any lab operating under GLP or ISO 17025 conditions.
The table below summarizes storage requirements by reagent category:
| Reagent category | Temperature | Light control | Special requirements |
|---|---|---|---|
| Aqueous buffers | 2 to 8°C (refrigerator) | Not required | Check for microbial growth; add sodium azide if long-term |
| Organic solvents | Flammable storage cabinet | Not required | Segregate from oxidizers; use ventilated cabinet |
| Photosensitive reagents | Per SDS, often 2 to 8°C | Amber glass or foil wrap | Minimize exposure time during use |
| Lyophilized proteins/peptides | -20°C or -80°C | Not required | Desiccate; avoid freeze-thaw cycles |
| Oxidizing agents | Cool, dry, ventilated cabinet | Not required | Segregate from flammables and organics |
Beyond temperature and light, the following practices define a sound post-handling storage protocol:
- Inspect containers before returning to storage. Check for cracks, damaged seals, or label degradation. A compromised container in a shared cabinet is a contamination and safety risk for every subsequent user.
- Label every container with the date of first opening. Many reagents have a reduced shelf life once opened, regardless of the printed expiry date. Sodium borohydride, for example, degrades rapidly on contact with moisture after the original seal is broken.
- Segregate incompatible chemicals using physical barriers or separate cabinets. Acids and bases, oxidizers and flammables, and cyanides and acids must never share the same storage space. Color-coded storage systems and chemical compatibility charts posted inside cabinet doors are standard practice in compliant labs.
- Track expiry dates with a reagent log or RFID system. Expired reagents are a primary source of false positives in assays, particularly in high-throughput screening where reagent stability directly affects signal decay and kinetic drift.
- Respond to spills immediately using the designated spill kit. Contain the spill, apply the appropriate absorbent material, and decontaminate the area before resuming work. Report all spills per your institution’s chemical safety protocol, regardless of volume.
Common mistakes and troubleshooting in lab reagent handling
The most frequent errors in reagent handling are not exotic. They are systematic, repeatable, and correctable once identified. Common mistakes include cross-contamination from tip reuse, improper labeling, handling without PPE, and inaccurate pipetting. Each of these leads directly to assay variability and, in the case of PPE omission, to hazardous chemical exposure.
- Cross-contamination from tip reuse. This is the most common source of carry-over in multi-reagent assays. The fix is absolute: one tip per reagent per sample, no exceptions.
- Incorrect reagent grade selection. Selecting reagent grade above what the assay requires increases cost without improving results. ACS or Analytical Reagent grades are sufficient for most reproducible analytical work. Using HPLC-grade solvents for a colorimetric assay is unnecessary expenditure.
- Ignoring SDS information. Researchers who skip the SDS review before handling an unfamiliar reagent are operating without critical hazard information. This is the most preventable category of lab injury.
- Improper plunger technique. Releasing the plunger too quickly during aspiration draws air into the tip and delivers a short volume. This error is invisible without calibration checks and systematically biases results downward.
- Inadequate workspace preparation. Starting a handling session on a contaminated bench or with an uncertified fume hood introduces variables that cannot be controlled for after the fact.
“Assay inconsistencies traced back to reagent mishandling are rarely random. They follow a pattern that points directly to the step where technique broke down. Systematic troubleshooting starts with the pipetting log, the lot number record, and the storage temperature data.”
For troubleshooting assay inconsistencies, start by isolating the reagent variable. Replace the suspect reagent with a fresh lot, repeat the assay under identical conditions, and compare results. If performance recovers, the original reagent was the source. If not, examine pipetting technique, labware cleanliness, and storage conditions in sequence. Automation, such as electronic pipettes with volume verification or liquid handling robots, reduces technique-dependent errors significantly in high-throughput environments. For guidance on sterile reagent handling specifically, the procedural requirements differ from standard chemical handling and warrant separate review.
Key takeaways
Correct lab reagent handling steps, from PPE selection and SDS review through pipetting technique and post-use storage, are the primary determinants of assay reproducibility and laboratory safety.
| Point | Details |
|---|---|
| Preparation precedes handling | Review the SDS, verify PPE, and confirm labware calibration before opening any reagent container. |
| Pipetting technique is decisive | Use new sterile tips per transfer, pipette vertically, and depress the plunger slowly to prevent volume errors and contamination. |
| Storage conditions are reagent-specific | Match temperature, light control, and segregation requirements to each reagent class to prevent degradation and incompatibility hazards. |
| Reagent grade selection affects cost and results | ACS or Analytical Reagent grade is sufficient for most analytical work; over-specifying grade increases cost without improving reproducibility. |
| Systematic troubleshooting isolates errors | When assay results are inconsistent, trace the issue through lot numbers, pipetting logs, and storage records before changing experimental variables. |
Why reagent handling discipline matters more than most researchers admit
My perspective on this topic is shaped by observing where research programs actually lose time and data quality. It is rarely the instrument. It is almost always the handling step that was treated as routine.
The assumption that experienced researchers do not need to follow written SOPs for reagent handling is one of the most costly beliefs in laboratory science. Expertise creates confidence, and confidence creates shortcuts. A researcher who has pipetted thousands of times is more likely to skip the tip change, not less, because the action feels redundant. The data does not care about experience. It reflects technique.
What I have found consistently is that labs with the best reproducibility are not necessarily using the most expensive reagents or the most advanced instruments. They are using reagent quality controls systematically, documenting lot numbers, and treating the pre-handling checklist as non-negotiable. The discipline is procedural, not technical.
RFID-based inventory management is underutilized in mid-sized research labs. The technology is not new, and the cost has dropped substantially. The accountability it creates, knowing exactly who pulled which reagent lot at what time, changes behavior in ways that posted reminders never do. If your lab is still running on handwritten reagent logs, the argument for upgrading is not efficiency. It is data integrity.
The balance between reagent purity and cost also deserves more direct attention. Researchers sometimes default to the highest available grade out of caution, which is understandable but not always justified. Knowing what your assay actually requires, and selecting accordingly, is a mark of scientific maturity, not corner-cutting.
— Ragnar
Premium reagents for researchers who cannot afford variability
Herbilabs supplies research-grade bacteriostatic water, sterile diluents, and reconstitution solutions manufactured under strict purity standards in a dedicated facility. Every product is subject to rigorous quality control to deliver contaminant-free reagents suitable for demanding research environments. For researchers working with lyophilized peptides or sensitive biological compounds, the reconstitution solution you choose directly affects downstream results. Explore Herbilabs’ high-purity reconstitution solutions to find the right product for your protocol, with wholesale pricing available for institutions and resellers across the UK and Europe.
FAQ
What are the core lab reagent handling steps?
The core steps are: review the SDS, don appropriate PPE, verify labware calibration, open the reagent in the correct containment zone, pipette with correct technique using new sterile tips, seal the container immediately after use, and store under conditions specified for that reagent class.
How do you prevent cross-contamination when handling reagents?
Use a new sterile pipette tip for every reagent and every sample transfer without exception. Carry-over contamination from tip reuse is the leading cause of assay variability in multi-reagent workflows.
What reagent grade should you use for analytical work?
ACS or Analytical Reagent grade is sufficient for most reproducible analytical work. Higher purity grades increase cost without improving results unless the assay specifically requires ultra-trace or HPLC-grade specifications.
How should hazardous chemical reagents be handled safely?
Hazardous reagents must be handled under a certified fume hood with full PPE, using approved containers and spill containment. Mouth pipetting is prohibited; use mechanical suction devices for all liquid transfers.
Why do assay results vary even when using the same reagent?
Lot-to-lot variation, expired reagents, and inconsistent pipetting technique are the primary causes. Reagent instability from improper storage causes signal decay and kinetic drift that produces false positives and inconsistent dose-response curves. Tracking lot numbers and storage conditions is the first step in diagnosing this variability.