Private Label, White Label, Wholesale partnerships available - EU, USA and UK - Free shipping from €75

Sterile Medicine Vials Explained for Lab Professionals
A junior researcher has 2 mL of reconstituted peptide solution to use across several working sessions. A 10 mL multi-dose vial is already sitting on the bench, so it seems like the obvious container. Then the details surface: the compound is light-sensitive, the stopper material wasn't selected for the formulation, and each future withdrawal will create another opportunity for contamination.
That decision isn't only about capacity. The vial, stopper, crimp, headspace, sterilization route, storage conditions, and withdrawal technique form one control system. A poor choice can create extractables, contamination risk, dose-counting errors, and an audit finding even when the liquid itself was prepared correctly.
Sterile medicine vials should therefore be evaluated as packaging systems, not as interchangeable glass containers. The practical questions are straightforward: Can the closure maintain a microbial barrier? Is the material compatible with the compound? Does the format suit the fill volume and access frequency? Can the supplier provide documentation that supports the intended research-use-only workflow?
Table of Contents
- Why the Vial You Choose Shapes Your Results
- What a Sterile Medicine Vial Actually Is
- Comparing Vial Formats and Dose Types
- Sterilization Methods Used in Vial Production
- The 28-Day Multi-Dose Rule Explained
- Regulatory and QA Standards to Know
- How to Select the Right Vial for Your Lab
- Aseptic Technique Still Beats the Preservative
Why the Vial You Choose Shapes Your Results
The researcher in the opening example faces four separate risks. A vial that is too large for the working volume creates unnecessary headspace and encourages repeated handling. A multi-dose format also creates more access events than a single-dose presentation. If the stopper doesn't reseal reliably after puncture, the container-closure system can become the weakest point in the workflow.
The container affects the chemistry
Glass and elastomeric closures can release substances into the formulation. The relevant question isn't whether a material is broadly described as pharmaceutical grade. It is whether the specific glass, stopper, coating, lubricant, and compound have been evaluated together. A peptide, small molecule, protein, antibody, or buffer can respond differently to the same closure materials.
Light sensitivity adds another selection factor. Clear glass may support visual inspection, but amber glass can provide a useful light barrier for formulations that degrade under exposure. The decision should be tied to stability data or supplier documentation rather than bench convenience.
Access changes the contamination profile
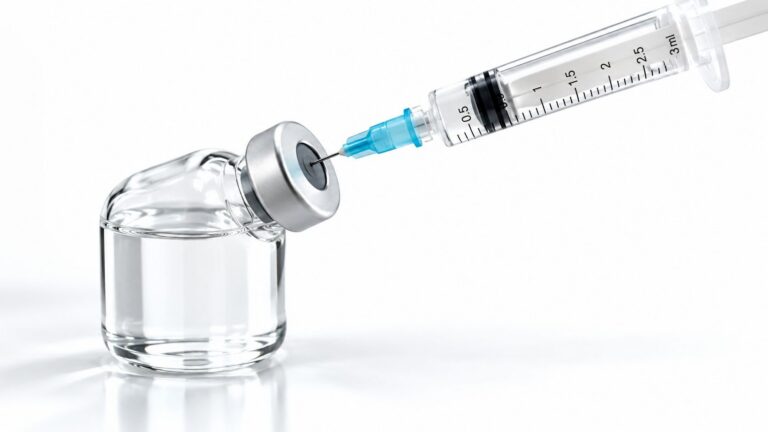
A vial that remains sealed has a different risk profile from one opened repeatedly. Each puncture uses the septum as both a physical barrier and a working interface. A fresh sterile needle and syringe, appropriate septum disinfection, and controlled storage matter more than choosing a vial labeled “multi-dose.”
Clinical in-use evidence illustrates why dating and handling procedures matter. One hospital study cultured 1,223 weekly samples from 863 multi-dose vials over three months and found no culture-positive samples, despite prolonged in-use periods. The findings supported dating vials when opened and discarding them when empty or expired rather than automatically discarding them after a single day. The study is indexed in this clinical in-use study of multiple-dose vials.
That evidence doesn't make every multi-dose vial safe indefinitely. It shows that controlled practice can support extended use, while earlier evidence also found that contamination was uncommon but not zero. A junior researcher needs a decision aid that connects the closure design, material compatibility, access pattern, and records before the vial reaches the bench.
What a Sterile Medicine Vial Actually Is
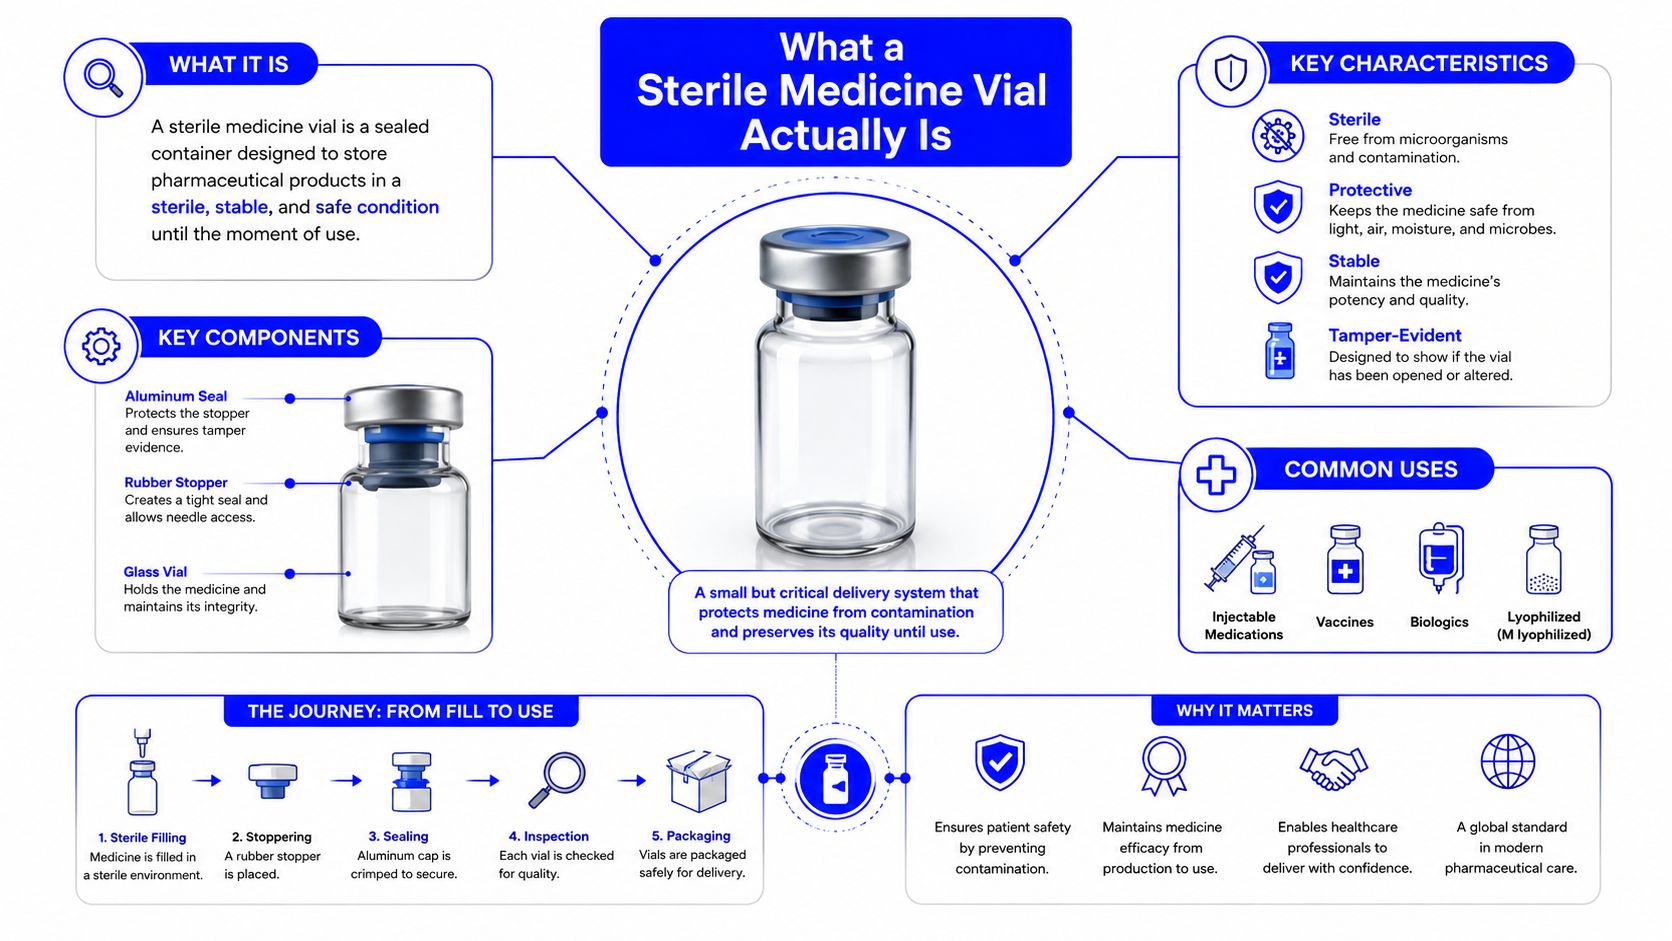
A sterile medicine vial is an integrated container-closure system. The glass or polymer body holds the formulation, the elastomeric stopper seals the opening, and the aluminum crimp keeps the stopper seated. The headspace also matters because the gas environment can influence oxidation, pressure, and stability.
An everyday comparison is a sealed coffee canister. The canister body holds the contents, the gasket creates the seal, and the trapped air between the lid and the coffee remains part of the package. A vial works in the same broad way. The container, septum, crimp, and headspace must perform together.
Three components need separate attention
The body may be Type I borosilicate glass, treated soda-lime glass, or a polymer such as cyclic olefin polymer. Historical pharmaceutical packaging developed from manually mold-blown soda-lime vials in the nineteenth century toward borosilicate formats used in modern injectable packaging, as described in this review of glass packaging for injectables.
The stopper may use butyl or bromobutyl elastomer, sometimes with a fluoroelastomer-facing layer. Its job is to maintain the seal before use and reseal as well as possible after needle withdrawal. The stopper also becomes a possible source of extractables, particles, or poor puncture performance if the material isn't matched to the formulation.
The crimp and headspace complete the system. The aluminum crimp holds the stopper in place, while the headspace can affect oxygen exposure and internal pressure. A vial isn't adequately assessed by looking only at the glass.
Sterilization status also needs careful wording. Components may be sterilized separately, and the final system may be filled and closed through an aseptic process. Depyrogenation is not the same as terminal sterilization. Depyrogenation removes or reduces pyrogenic contamination, while sterilization addresses viable microorganisms. A sterility assurance level of 10 to the minus 6 is commonly used as a practical benchmark for a validated sterilization process, but the number isn't a substitute for process validation.
For a related explanation of reconstitution workflows, researchers can review the guide to bacteriostatic water, while keeping in mind that the diluent and its vial still need to be handled aseptically.
Comparing Vial Formats and Dose Types
The right format depends on what the formulation needs and how the lab will use it. Glass generally provides a strong barrier and broad chemical compatibility, but it adds weight and breakage risk. Polymer containers reduce breakage concerns and can suit some frozen workflows, although solvents may stress-crack certain plastics.
A single-dose vial removes repeated-entry risk after the dose is withdrawn. It can simplify labeling and reconciliation, but partial-use waste may be substantial. A multi-dose vial supports repeated withdrawals and can reduce waste, yet it places greater responsibility on septum disinfection, sterile components, storage, access records, and the assigned in-use period.
Material and dose format at the bench
For a light-sensitive peptide, amber glass may be more appropriate than clear glass if the formulation and stability program support that choice. For a protein or antibody, the lab should examine silicone exposure, stopper compatibility, adsorption concerns, and the effect of repeated puncture. For a buffer used once in a controlled procedure, a single-dose vial may be easier to defend than a multi-dose presentation.
The vial's nominal capacity shouldn't be confused with the intended fill volume. A 2 mL vial, 10 mL vial, or 50 mL vial can each be appropriate in different workflows, but the selected size should leave enough usable headspace while avoiding an unnecessarily large container. Teams evaluating choosing a 30 mL vial for sterile should compare actual fill volume, access frequency, storage space, and the closure's puncture history.
| Use Case | Recommended Material | Typical Size | Dose Type | Key Reason |
|---|---|---|---|---|
| Peptide reconstitution | Type I glass or compatible polymer | 2 mL or 10 mL | Single-dose or multi-dose | Match light protection, chemical compatibility, and expected withdrawals |
| Vaccine research | Validated glass or polymer system | 10 mL or 50 mL | Multi-dose where justified | Repeated access requires strict aseptic controls and documented dating |
| Biologic or antibody work | Low-extractables glass or qualified polymer | 2 mL or 10 mL | Often single-dose | Reduce interaction risk and simplify control of sensitive formulations |
| Buffer preparation | Glass or compatible polymer | 10 mL or 50 mL | Single-dose or multi-dose | Select for solvent compatibility, handling convenience, and waste control |
The table is a starting point, not a release decision. Supplier data should address the exact stopper construction, sterilization status, closure integrity, and chemical compatibility for the intended use.
Sterilization Methods Used in Vial Production
A vial certificate may describe the container as sterilized, depyrogenated, ready to use, or supplied for aseptic filling. Those terms describe different process routes. The lab manager should connect the route to the formulation and the evidence supporting it.
Terminal dry heat is commonly associated with glass depyrogenation. A process may use 250 degrees Celsius for 30 minutes as a minimum condition for clearing endotoxins in the production approach described in the brief, but the validated cycle, load configuration, and equipment qualification remain decisive. This route suits heat-stable glass and compatible components, not temperature-sensitive proteins.
Moist heat autoclaving uses steam and can suit heat-stable aqueous products or components. The formulation may experience pH movement, concentration changes, or interaction with materials during the cycle. A lab should review post-cycle appearance, assay, pH, and container performance rather than assuming that a successful autoclave cycle proves product suitability.
Sterile filtration passes a compatible liquid through a sterilizing-grade membrane before filling into pre-sterilized vials. It often fits protein, peptide, and cell-related products that cannot tolerate heat, but filter compatibility, adsorption, pressure, bioburden control, and aseptic transfer require validation.
Aseptic fill-finish combines pre-sterilized components, controlled environments, trained operators, and process simulations. The vial doesn't become safe because one step was performed in isolation. The controls must work together from component preparation through filling, stoppering, crimping, and inspection.
A clear explanation of the difference between disinfecting and sterilizing helps prevent a common bench error. Wiping an external surface can reduce contamination; it doesn't establish sterility throughout a vial or its contents.
| Sterilization Method | Typical Conditions | Best Suited For | Key QA Check |
|---|---|---|---|
| Dry heat and depyrogenation | Validated high-temperature cycle | Heat-stable glass and compatible components | Cycle mapping and endotoxin control |
| Moist heat autoclaving | Validated steam cycle | Heat-stable aqueous products and components | Product stability, pH, and closure performance |
| Sterile filtration | Filtration into pre-sterilized vials | Heat-sensitive peptides, proteins, and biologic solutions | Filter integrity, compatibility, and aseptic transfer |
| Aseptic fill-finish | Controlled environment with sterile components | Formulations that cannot receive terminal heat | Environmental monitoring, media fills, and intervention control |
The 28-Day Multi-Dose Rule Explained
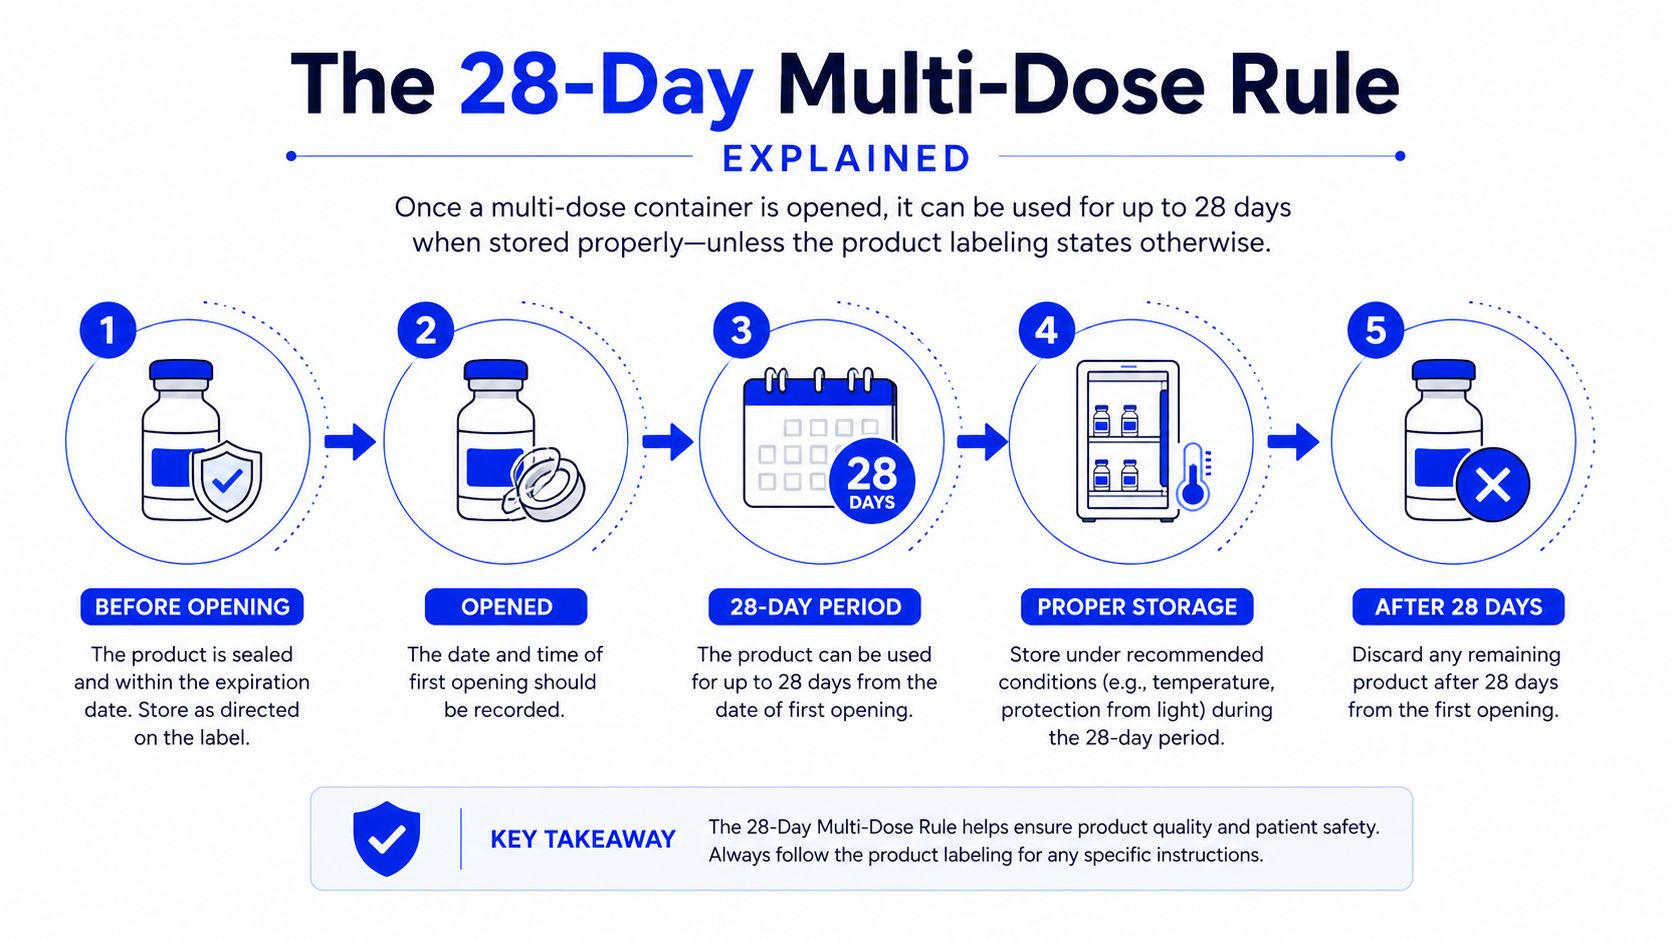
The 28-day rule is an in-use control, not a claim that a preserved vial remains sterile under every condition. CDC injection-safety guidance says each access should use a sterile needle or cannula and syringe, multi-dose vials should stay out of immediate patient-treatment areas, and opened multi-dose vials should generally be discarded within 28 days unless the manufacturer specifies otherwise. The same guidance warns that leaving a needle in the septum creates a direct route for microorganisms to enter the fluid, as detailed in the CDC injection-safety guidance.
Three controls are often confused.
Preservative action
Benzyl alcohol, phenol, and methylparaben can inhibit microbial growth in formulations designed to contain them. They don't sterilize a contaminated solution, repair a damaged septum, or compensate for a reused syringe. Preservative action can provide additional protection, but it isn't permission to ignore aseptic handling.
Septum condition
Every puncture can affect the closure. Poor needle choice, angled entry, excessive force, coring, and repeated access at the same point can damage the elastomer. A vial that has reached the assigned time limit should be discarded, and a vial with visible stopper damage or changed solution clarity should be discarded sooner.
Technique and storage
The practical workflow is simple but unforgiving:
- Date the opening: Record the opened-on date and the assigned discard date.
- Use sterile components: Use a new sterile needle or cannula and syringe for every withdrawal.
- Disinfect the septum: Allow the disinfectant to work according to the lab procedure before puncture.
- Control storage: Keep the vial under the labeled storage conditions and limit room-temperature exposure.
- Record withdrawals: Document each access when traceability or dose reconciliation matters.
Clinical evidence has shown that contamination can be uncommon in controlled use while still not being impossible. The safer interpretation is that the 28-day limit works alongside closure integrity, storage, and technique. It doesn't replace them.
The following video provides a visual supplement for teams training on multi-dose handling.
Regulatory and QA Standards to Know
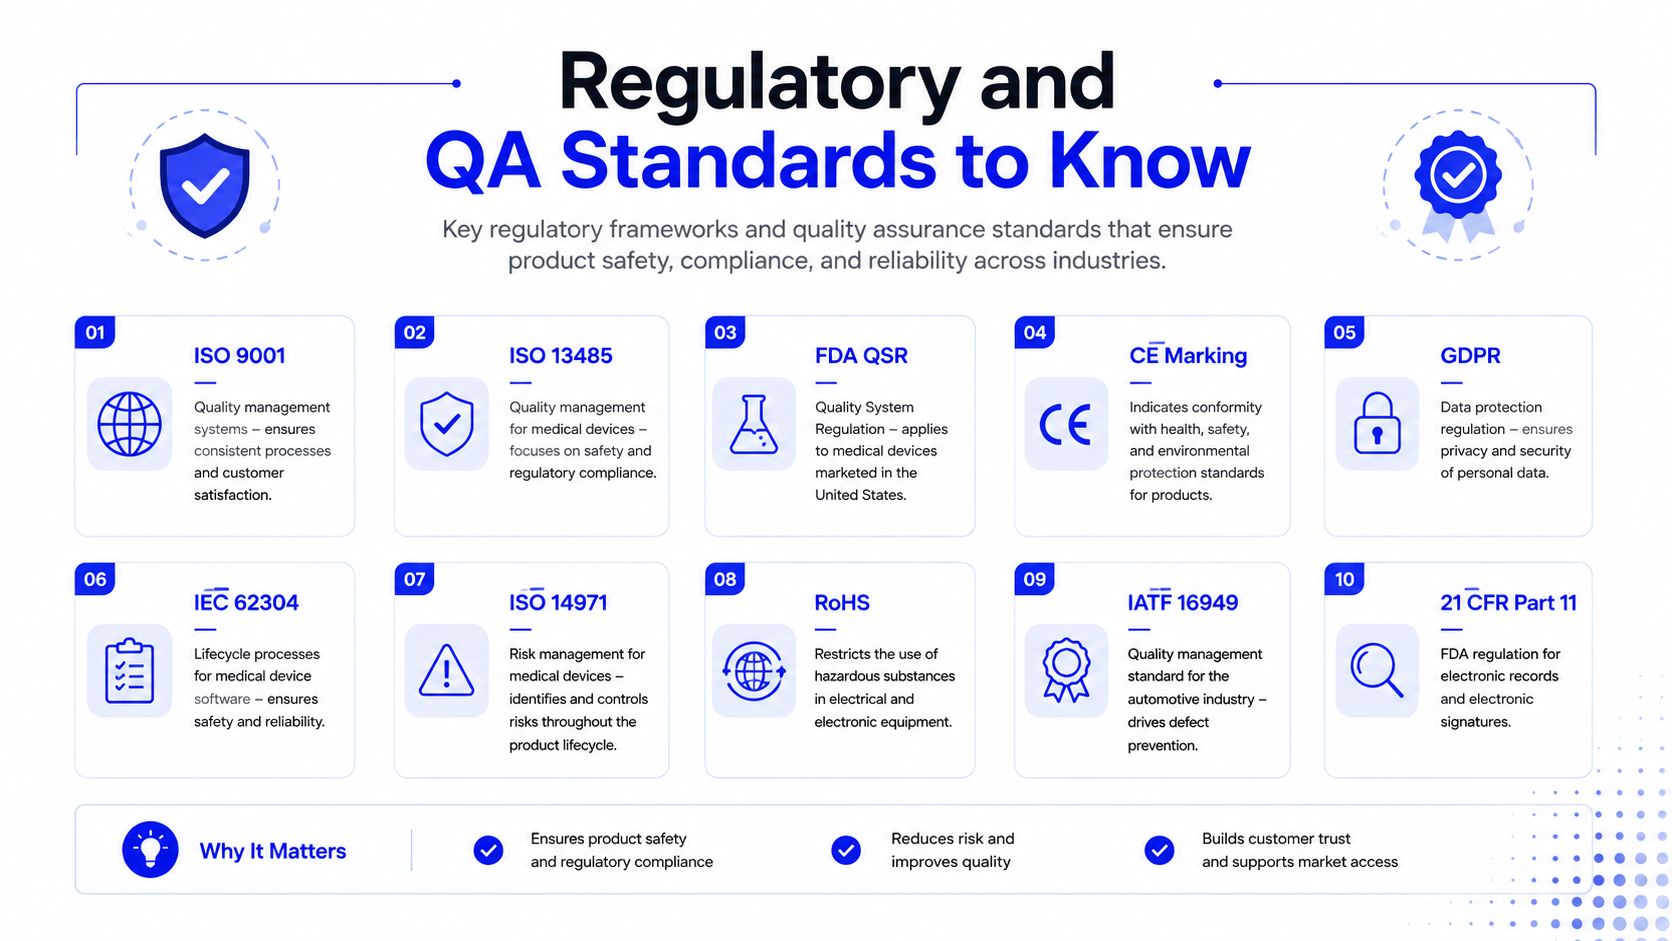
A small research lab doesn't need to reproduce a commercial manufacturing dossier for every experiment. It does need enough evidence to show that the vial is suitable, intact, compatible, and handled under a controlled procedure.
Start with container-closure integrity
FDA guidance treats validated container-closure integrity testing, or CCIT, as evidence that a sterile package remains sealed against microbial ingress over its intended life. Practical methods include bubble testing, pressure or vacuum decay, trace-gas leak testing, dye penetration, and microbial challenge or immersion testing. The guidance recommends validated testing at annual intervals and at the end of expiration for sterile products, as described in the FDA container-closure integrity guidance.
Deterministic methods, such as helium leak or validated pressure decay, provide measured outputs. Dye ingress and microbial challenge methods are probabilistic and can still have a role when appropriately validated. A small lab may use a qualified dye ingress procedure for incoming checks, but a stability program, supplier qualification, or deviation investigation may justify contracting a specialist for deterministic testing.
Match the standards to the records
Glass and closure suitability should be supported by relevant pharmacopeial documentation. The supplied evidence identifies USP <660>, EP 3.2.1, and JP <7.01> as standards associated with safe pharmaceutical glass packaging. Extractables and leachables require a profile that reflects the actual formulation and closure, not a generic statement that the material is compliant.
A practical incoming package includes:
- COA review: Confirm lot identity, material, sterilization status, and release approval.
- Visual inspection: Check for cracks, chips, particles, damaged crimps, and abnormal stopper appearance.
- Integrity evidence: Retain the supplier's validated CCIT summary or perform a qualified incoming test.
- Compatibility records: Keep extractables information and closure construction details on file.
- Endotoxin rationale: Document the limit calculation and test approach aligned with the applicable method.
For reseller workflows, ISO 9001 documentation for resellers can help organize traceability, supplier records, and review responsibilities. The standard doesn't make an unsuitable vial suitable. It supports a repeatable system for deciding whether the evidence is complete.
How to Select the Right Vial for Your Lab
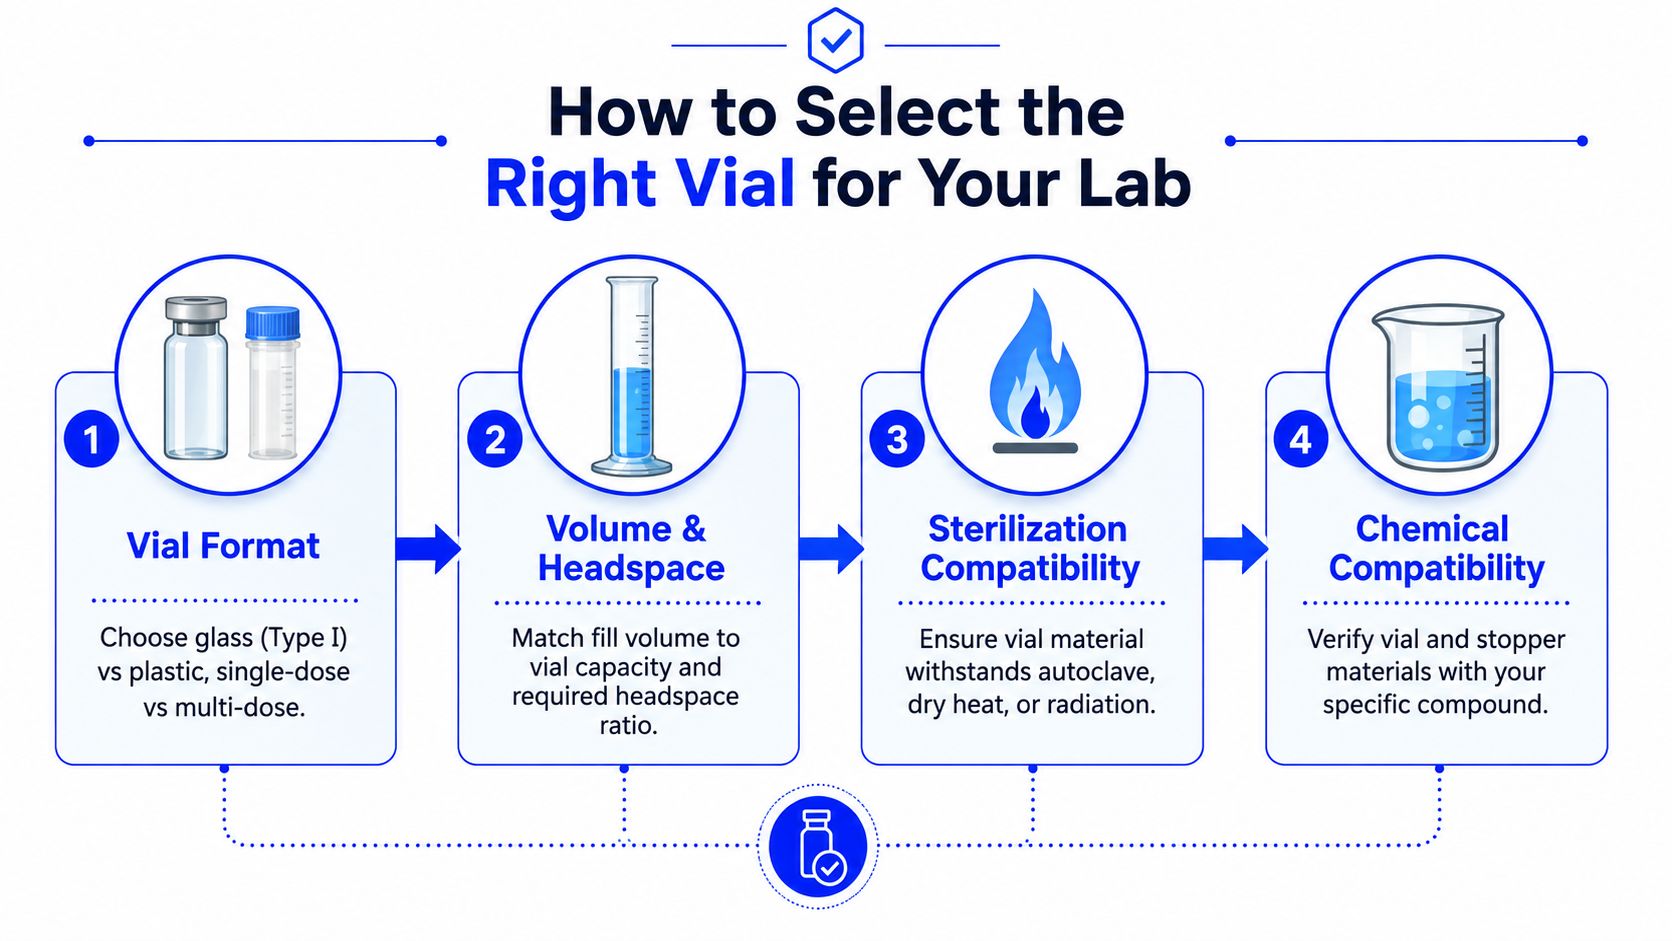
Selection works best as a chain of decisions. The product's chemistry comes first, followed by the fill volume, access pattern, sterilization route, and documentation needed to defend the choice.
A working selection checklist
Define the formulation. Record whether the material is a peptide, small molecule, protein, antibody, buffer, or another solution. Note light sensitivity, solvent content, pH requirements, and known interaction risks.
Choose the format. Select glass or polymer based on compatibility, breakage risk, frozen storage, and required barrier performance. Choose single-dose when repeated access isn't justified. Choose multi-dose only when the workflow can control every entry.
Match capacity to use. A peptide team reconstituting small working quantities may choose a small glass multi-dose vial when repeated access is necessary, or a single-dose format when the entire volume can be used promptly. A compounding workflow preparing 10 mL aliquots needs a container that supports that fill without excessive unused capacity.
Confirm the process route. A heat-sensitive biologic may require sterile filtration and aseptic filling, while a heat-stable buffer component may tolerate a validated heat process. The vial and stopper must withstand the selected route.
A stability study deserves deeper documentation than a routine exploratory preparation. The team should request closure construction, CCIT evidence, extractables information, sterilization records, visual inspection requirements, and lot-specific release documentation. Herbilabs is one example of a supplier offering sterile, non-pyrogenic reconstitution solutions in glass multi-dose formats for research-use-only workflows, with lot-specific Certificates of Analysis described in its product information.
Aseptic Technique Still Beats the Preservative
A preserved multi-dose vial isn't self-protecting. The preservative can slow microbial growth, but it doesn't sterilize contamination introduced through a reused syringe, a retained needle, a poorly disinfected septum, or a damaged stopper.
Consider two withdrawals from the same vial. In the controlled workflow, the operator disinfects the septum, uses a new sterile needle and syringe, avoids unnecessary exposure, and returns the vial to labeled storage. In the uncontrolled workflow, the operator leaves a needle in place or re-enters with equipment that has already contacted another surface. The vial and preservative are identical, but the contamination pathway is not.
Bench rule: A passed integrity test, a preservative, and a discard date are supporting defenses. The operator's hands and handling sequence remain the primary contamination control during repeated access.
The safest practice is to train the exact movements that protect the closure. Operators should know where to place the vial, how to disinfect the septum, when to replace components, how to inspect the stopper, and when to discard a solution whose clarity or container condition has changed. Good vial selection reduces risk. Aseptic technique controls the risk that remains.
Herbilabs supplies sterile, non-pyrogenic reconstitution solutions in multi-dose glass vial formats for research-use-only peptide, protein, and antibody workflows, with lot-specific quality documentation. Researchers and lab managers can review the available formats and documentation at Herbilabs before selecting a vial and handling procedure that fit the formulation.