Private Label, White Label, Wholesale partnerships available - EU, USA and UK - Free shipping from €75

Peptide Reconstitution Steps: A Practical Lab Protocol
A researcher has a 5 mg peptide vial on the bench, a fresh vial of bacteriostatic water nearby, and one decision to make before the powder ever sees liquid: how should the diluent enter the vial? The answer affects more than the final concentration. Solvent choice, dilution volume, stopper handling, wetting time, mixing energy, and storage all influence whether the reconstituted material remains usable across repeated research access.
The most reliable peptide reconstitution steps treat the method as a controlled procedure rather than a quick inject-and-swirl task. The lyophilized powder is relatively stable compared with the dissolved preparation, where aggregation, precipitation, adsorption, and microbial contamination become practical concerns. The workflow below is built around bacteriostatic water and a 28-day multi-access window when handled aseptically, while also showing when sterile water is more appropriate for immediate, single-use work.
Table of Contents
- Why the Method Matters More Than the Final Number
- Choosing Your Solvent and Working the Concentration Math
- Preparing a Clean Workspace and Handling Materials Aseptically
- The Actual Reconstitution Procedure From Vial to Solution
- Aliquoting, Storage, and the 28-Day Multi-Access Window
- Troubleshooting Cloudy Vials and Peptides That Will Not Dissolve
- Closing Checklist for a Reproducible Reconstitution Workflow
Why the Method Matters More Than the Final Number
The concentration calculation is important, but it isn't the part that most often ruins a batch. A vial can contain the intended amount of peptide and still produce an unusable solution if the diluent strikes the powder forcefully, the operator shakes the vial, the solvent doesn't suit the sequence, or repeated access introduces contamination.
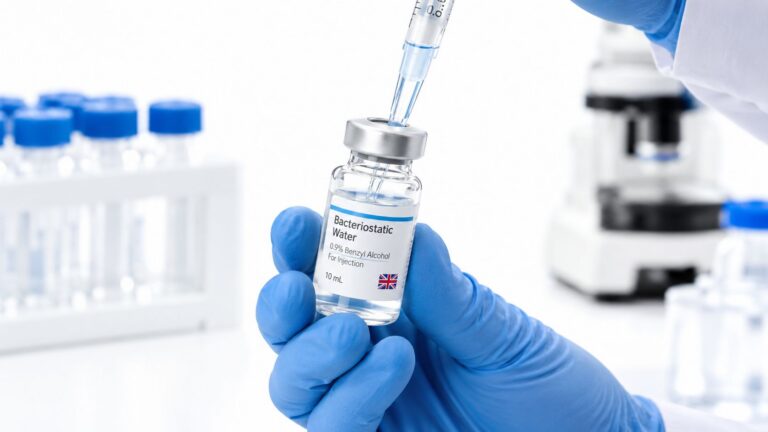
Bacteriostatic water contains 0.9% benzyl alcohol and is designed for multi-dose access. Technical guidance commonly associates aseptic handling with repeated withdrawals for up to 28 days after puncture, while preservative-free sterile water is generally treated as a single-use solvent. The distinction changes the entire workflow. A lab using sterile water prepares for immediate use, whereas a lab using bacteriostatic water can organize repeated sampling, provided the vial is dated, refrigerated, and accessed aseptically. The historical bacteriostatic-water reconstitution workflow describes the now-familiar sequence of warming materials, disinfecting stoppers, adding diluent slowly, and avoiding vigorous agitation.
The dissolved state is where failures begin
The dry cake doesn't experience liquid-solid interfaces, repeated stopper entries, or temperature changes in the same way as a reconstituted solution. Once dissolved, the peptide can encounter air-liquid stress, incompatible pH, inadequate solubility, and handling conditions that encourage visible haze or aggregation.
A common mistake is to focus only on achieving a target such as 1 mg/mL. That number says what concentration the operator wants, but it doesn't describe how the solution got there. Two preparations with the same nominal concentration can behave differently if one was made by slowly wetting the vial wall and the other was created by rapidly jetting solvent directly onto the cake.
Practical rule: A correct concentration doesn't rescue a poorly controlled reconstitution method.
The workflow needs an audit trail
The preparation should be treated like any other small laboratory process. The operator needs to know which peptide lot was used, which diluent and volume were selected, how the stopper was handled, when the vial entered refrigeration, and whether the final solution was clear or hazy.
That discipline matters especially when a vial will be sampled over days or weeks. The 28-day multi-access model is useful because it supports batch-style handling, but it also creates more opportunities for contamination and inconsistent technique. A dated vial with a recorded method is easier to evaluate than a vial whose history exists only in memory.
Choosing Your Solvent and Working the Concentration Math
Solvent selection starts with the peptide's sequence, charge, hydrophobicity, and known solubility behavior, not with a universal dilution habit. Bacteriostatic water is a practical choice for routine repeated-access work. Preservative-free sterile water suits a preparation intended for immediate, single-session use. Aggregation-prone or hydrophobic sequences may require a compound-specific diluent such as dilute acetic acid or ammonia-water, but that choice should come from validated technical guidance for the sequence rather than guesswork.
The basic calculation is straightforward:
Concentration in mg/mL = peptide mass in mg ÷ solvent volume in mL
For a 5 mg vial targeting 1 mg/mL, the required volume is:
Volume = mass ÷ target concentration
Volume = 5 mg ÷ 1 mg/mL = 5 mL
That is also the commonly used rule of thumb of 1 mL of bacteriostatic water per 1 mg of peptide, which produces a nominal 1 mg/mL solution. The peptide calculator reconstitution guide can help verify the arithmetic before the vial is opened.
Choose volume around the working problem
The 1 mL per 1 mg rule is a starting point, not a chemical law. If a peptide tends to form a gel at a particular concentration, a larger solvent volume may improve handling by producing a more dilute preparation. The trade-off is greater total volume and potentially more storage or aliquoting space.
A smaller volume can produce a concentrated working solution, including preparations in the 2–10 mg/mL range, but only when the peptide remains soluble and the downstream assay can accommodate the concentration. Doubling the diluent volume halves the final concentration, so volume errors translate directly into concentration errors.
| Peptide class | Recommended diluent | Typical working concentration |
|---|---|---|
| Routine water-compatible peptides | Bacteriostatic water for repeated access | Around 1 mg/mL |
| Immediate-use preparations | Preservative-free sterile water | Use the concentration required for the same-session assay |
| Hydrophobic sequences | Validated dilute acetic acid or another sequence-compatible solvent | Use the lowest concentration that remains fully soluble |
| Aggregation-prone peptides | Sequence-specific solvent system, tested on a small amount first | Use a concentration below the observed solubility ceiling |
| Protein or antibody materials | Validated formulation buffer or compatible reconstitution solution | Follow the material-specific specification |
Before touching the stopper, perform a unit check. Confirm the peptide mass in mg, the solvent volume in mL, the target concentration in mg/mL, the vial's physical capacity, and enough headroom for syringe dead volume. A calculation can be mathematically correct and still be operationally poor if the selected volume leaves no practical room for withdrawal.
Preparing a Clean Workspace and Handling Materials Aseptically
A clean reconstitution begins before the syringe package is opened. The bench should be cleared, decontaminated with 70% ethanol, and covered with a fresh workspace liner. Vials, sterile syringes, sterile needles, alcohol swabs, labels, and a sharps container should be within reach so the operator doesn't search for supplies after touching a stopper.
The peptide label, lot number, and COA should be checked together. The mass printed on the vial must match the calculation, and the diluent type must match the planned workflow. If the preparation is intended for repeated access, the operator should confirm that the chosen diluent is a bacteriostatic formulation rather than assuming that all sterile water products support multi-dose use. The bacteriostatic water handling guide provides a reference for this distinction.
Small movements prevent large problems
Remove the protective cap without touching the rubber stopper or the inside of the cap. Swab both the peptide vial stopper and the diluent vial stopper with fresh isopropyl alcohol, then let the surfaces dry. A wet stopper can carry residual alcohol through the puncture, while blowing on it replaces one contamination risk with another.
Use a new sterile needle and syringe for each transfer. The needle that enters the diluent vial shouldn't be carried over to the peptide vial, and a drawing needle shouldn't be reused across vials. Keep the sterile needle away from the bench, gloves, labels, and cap faces.
The operator should also avoid pushing unnecessary air into the peptide vial. Positive pressure can force aerosol or liquid movement in an uncontrolled way and may create foaming during addition. The safest setup is an uncluttered bench, a stable vial, and a controlled withdrawal and transfer sequence.
Preflight check
Before the first puncture, verify:
- Identity: Peptide name or sequence, lot number, COA reference, and labeled mass agree.
- Calculation: Selected volume and final concentration are written down with units.
- Diluent: The solvent is correct for the intended single-use or multi-access workflow.
- Asepsis: Stoppers are dry after disinfection, and sterile supplies are ready.
- Documentation: Labels include space for reconstitution date, initials, concentration, and storage information.
That short pause catches errors while correction is still simple.
The Actual Reconstitution Procedure From Vial to Solution
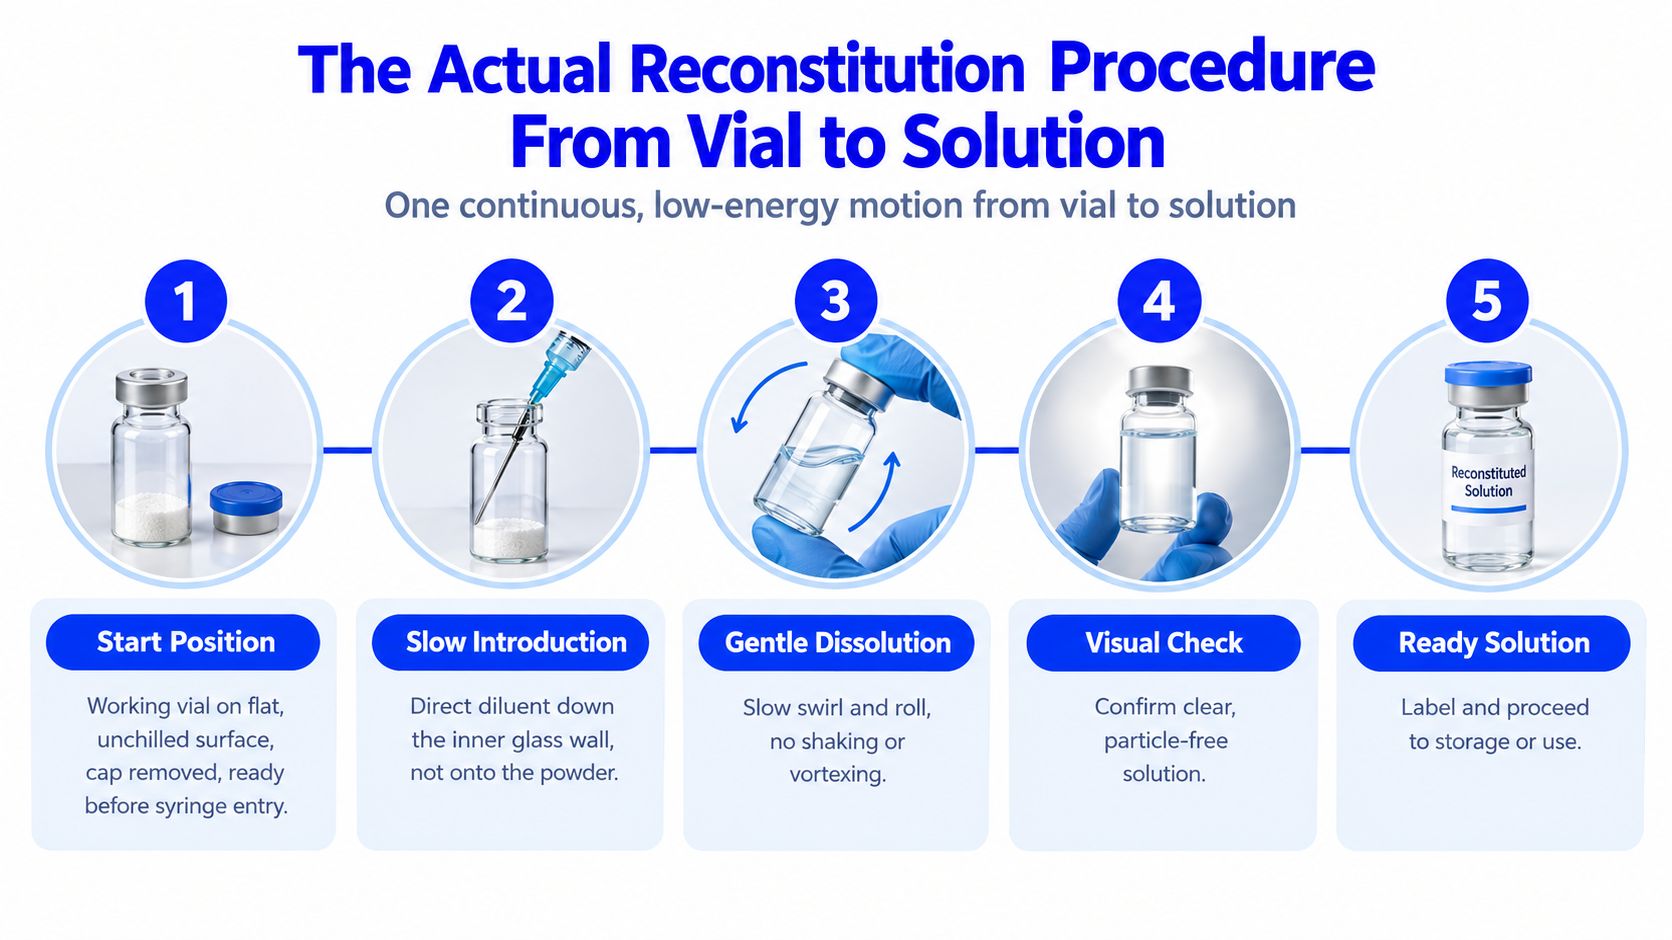
The dissolution should be one continuous, low-energy motion. Place the working vial on a flat, unchilled surface, remove the cap, and allow the material and diluent to reach room temperature. The vial should be ready before the syringe enters, because interruptions encourage rushed handling.
- Inspect the stopper. Confirm it hasn't already been pierced and disinfect it with a fresh 70% isopropyl alcohol pad. Let the surface dry completely.
- Prepare the syringe. Attach a new sterile needle to a new sterile syringe. Draw the calculated diluent volume, allowing only the practical amount needed to account for syringe dead volume. Avoid creating an uncontrolled overdraw that changes the actual transfer.
- Enter the stopper with control. Insert the needle through the stopper at roughly a 45-degree angle, then straighten it once the needle has passed through the rubber.
- Direct the liquid down the glass. Position the needle so the diluent runs slowly along the inner vial wall. Don't aim the stream at the lyophilized cake. A slow, steady plunger movement reduces impact, frothing, and localized wetting stress.
- Allow passive wetting. Keep the vial upright for 30–60 seconds so the cake can hydrate gradually. Then use a gentle swirl or slow roll to encourage dissolution.
Inspect between movements
After each gentle swirl, hold the vial against a suitable light background and examine the liquid. Look for a gradual clarity shift, persistent haze, floating particles, foam, or material adhering to the glass. A slight temporary change during wetting isn't the same as stable cloudiness, but visible particles or a haze that doesn't resolve should stop the workflow.
The operator shouldn't shake, vortex, rapidly invert, sonicate, or pre-warm the vial in a heat block. Vigorous agitation increases air-liquid interfacial stress, which can promote frothing and aggregation. Rapid inversions also create uncontrolled contact between the liquid and the cake, while heat adds another variable that may accelerate degradation or alter solubility.
Gentle swirling is a dissolution technique. Shaking is a stress test the peptide didn't ask for.
If the solution becomes clear and particle-free, label it immediately. If it remains cloudy or develops clumps, do not force the preparation through the rest of the workflow because the calculated concentration is correct. The method has already produced a warning signal.
Aliquoting, Storage, and the 28-Day Multi-Access Window
Aliquoting is a reproducibility decision, not merely a convenience. Every entry through a parent-vial stopper creates another contamination opportunity, and every temperature cycle adds another variable to the preparation. Dividing a reconstituted solution into appropriately sized working portions can reduce unnecessary handling and keep each experiment closer to a defined starting condition.
A practical arrangement uses a sterile multi-dose vial or pre-sterilized cryovials for working portions. The parent vial remains reserved for transferring aliquots, while the aliquots are sized around the experiment's actual working volume. A laboratory may choose portions such as 0.5–1 mL when those volumes match its assays, but the correct size depends on the method and should avoid repeated freeze-thaw exposure.
Build the storage decision around the solvent
For bacteriostatic-water preparations, refrigeration at 2–8°C supports multi-use access for up to 28 days when the vial is handled aseptically. Preservative-free sterile water is generally treated as single-use, with some guidance recommending use within 24–48 hours at 4°C. The handling 10 ml bac water for peptide reference is relevant when selecting a vial format for repeated research access.
| Solvent | Storage temperature | Typical usable window | Multi-access safe? |
|---|---|---|---|
| Bacteriostatic water | 2–8°C | Up to 28 days with aseptic handling | Yes, within the stated in-use window |
| Preservative-free sterile water | 4°C when short-term guidance is followed | 24–48 hours in some guidance | No, treat as single-use |
| Sequence-specific acidic or alkaline diluent | Follow validated material guidance | Depends on the peptide and formulation | Depends on validation |
For each aliquot transfer, wipe the parent stopper, use a fresh sterile syringe, draw the required volume, transfer it into the receiving container, and re-wipe the stopper before storage. The exact number of entries should be controlled by the laboratory's SOP rather than casual habit. Repeated access also makes labeling essential, especially when multiple lots or concentrations occupy the same refrigerator.
Avoid repeatedly freezing and thawing working aliquots. A vial can look correctly concentrated after temperature cycling while producing a weaker or less reproducible assay signal. Storage location, temperature, reconstitution date, and intended use-by date belong on the label and in the electronic lab record.
Troubleshooting Cloudy Vials and Peptides That Will Not Dissolve
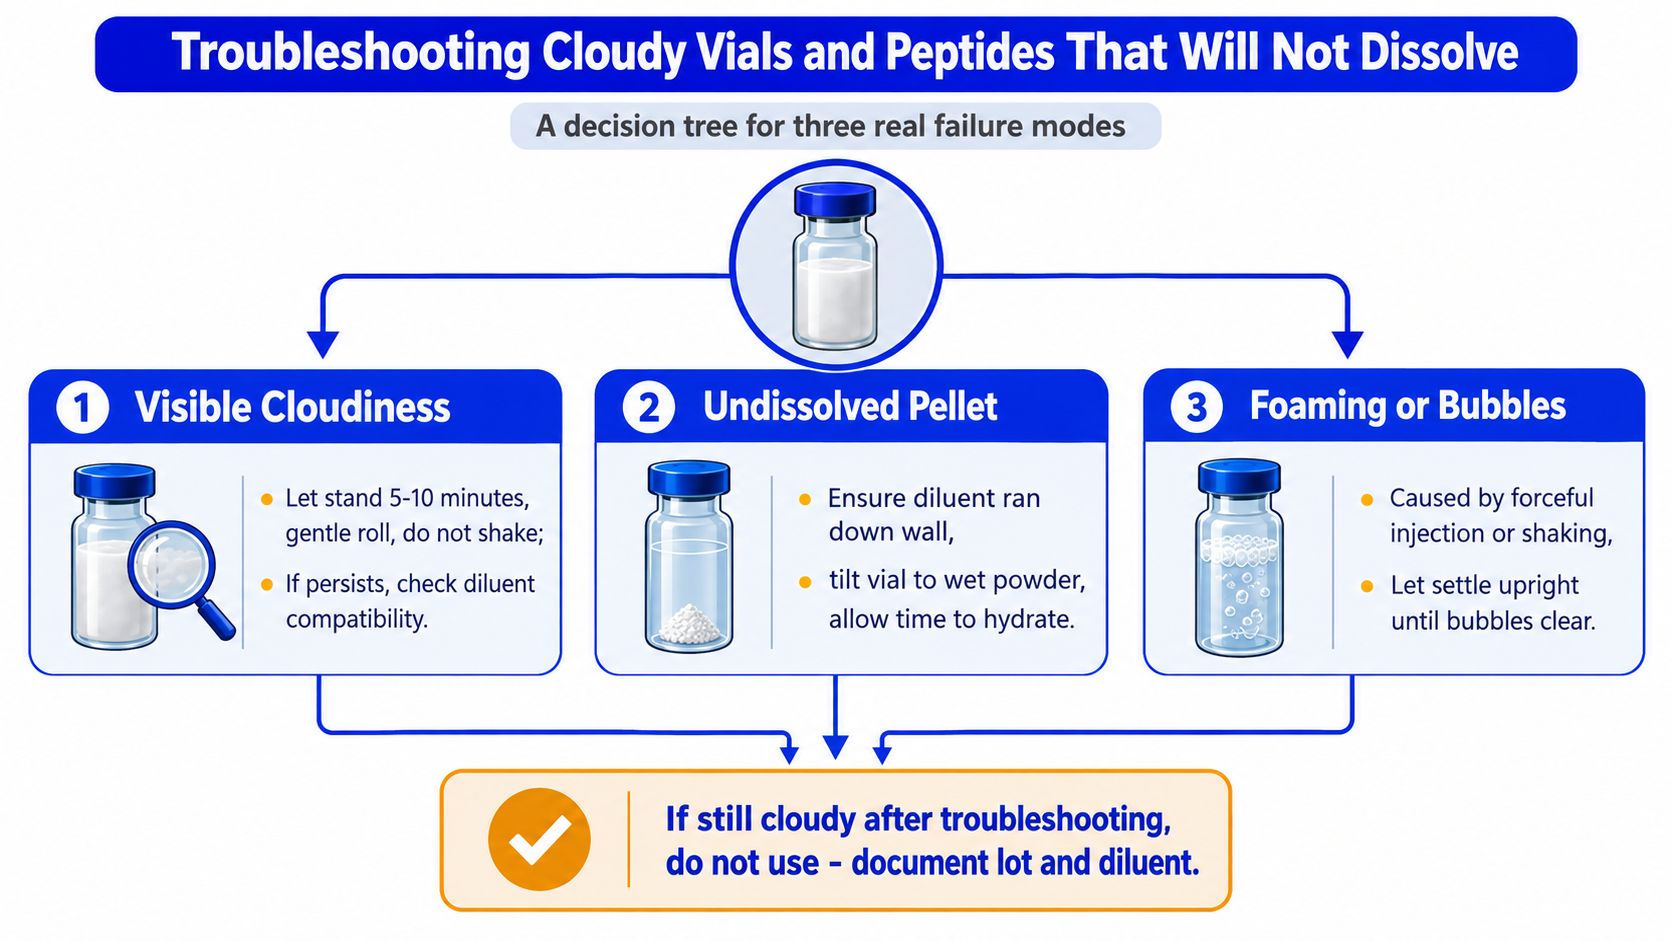
Most generic protocols become vague when the solution doesn't clear. A better approach is to separate transient haze, persistent clumps, and clear material that still fails the assay, because each points to a different problem.
Start with the least disruptive response. Leave the vial upright for five minutes, then apply a second slow swirl. If the material remains unchanged, allow it to come to room temperature for 10 minutes and reassess. Don't escalate immediately to shaking or repeated forceful mixing. Independent reconstitution guidance warns that agitation can promote foaming and aggregation, while cloudiness or visible precipitate should trigger reassessment of solvent and pH.
Use the appearance as a decision point
A faint haze that slowly diminishes may reflect incomplete wetting or a concentration near the solubility limit. A persistent cloud, visible precipitate, or gel-like material that reforms after mixing is more concerning. A hydrophobic or aggregation-prone peptide may need a validated solvent system, such as dilute acetic acid, instead of bacteriostatic water. The solvent should be changed only after the sequence and formulation requirements have been checked.
Filtration isn't a universal rescue. A low-binding PES filter may be appropriate for a compatible, lightly hazy solution when the process requires particle removal. Nylon can bind some peptide materials, and filtration can also remove the very material the assay needs. A visible gel that returns after filtration or reappears within hours indicates that the batch should be treated as failed rather than repeatedly processed.
Failure signal: If cloudiness persists after passive wetting, gentle swirling, and solvent review, document the batch instead of rationalizing it into use.
Clear does not always mean acceptable
A clear vial can still fail downstream because appearance only addresses visible particles. Where the assay requires it, check pH, record absorbance at 280 nm, compare the result with the sequence-predicted extinction coefficient, and reconcile the result with the COA. These checks help distinguish a visual success from a preparation that meets the experiment's requirements.
The technical dissolution and reconstitution guidance supports starting with the simplest effective solvent, testing a small amount when solubility is uncertain, adding diluent along the wall, and allowing passive wetting before gentle mixing. That sequence protects the next batch from a rushed troubleshooting decision.
Closing Checklist for a Reproducible Reconstitution Workflow
A reproducible preparation ends with documentation, not with the moment the vial becomes clear. The record should let another analyst reconstruct what happened without relying on memory or an unlabeled vial.
Before signing off, confirm the following:
- Lot identity: Record the peptide lot number and COA reference.
- Diluent details: Log the solvent type and total volume added.
- Calculation: Record the final concentration in mg/mL and retain the arithmetic.
- Timing: Add the reconstitution date, analyst initials, and intended use-by date within the applicable in-use window.
- Aliquots: Note the number of portions, volume per portion, and storage location.
- Visual result: Record whether the preparation was clear, slightly hazy, or persistently cloudy.
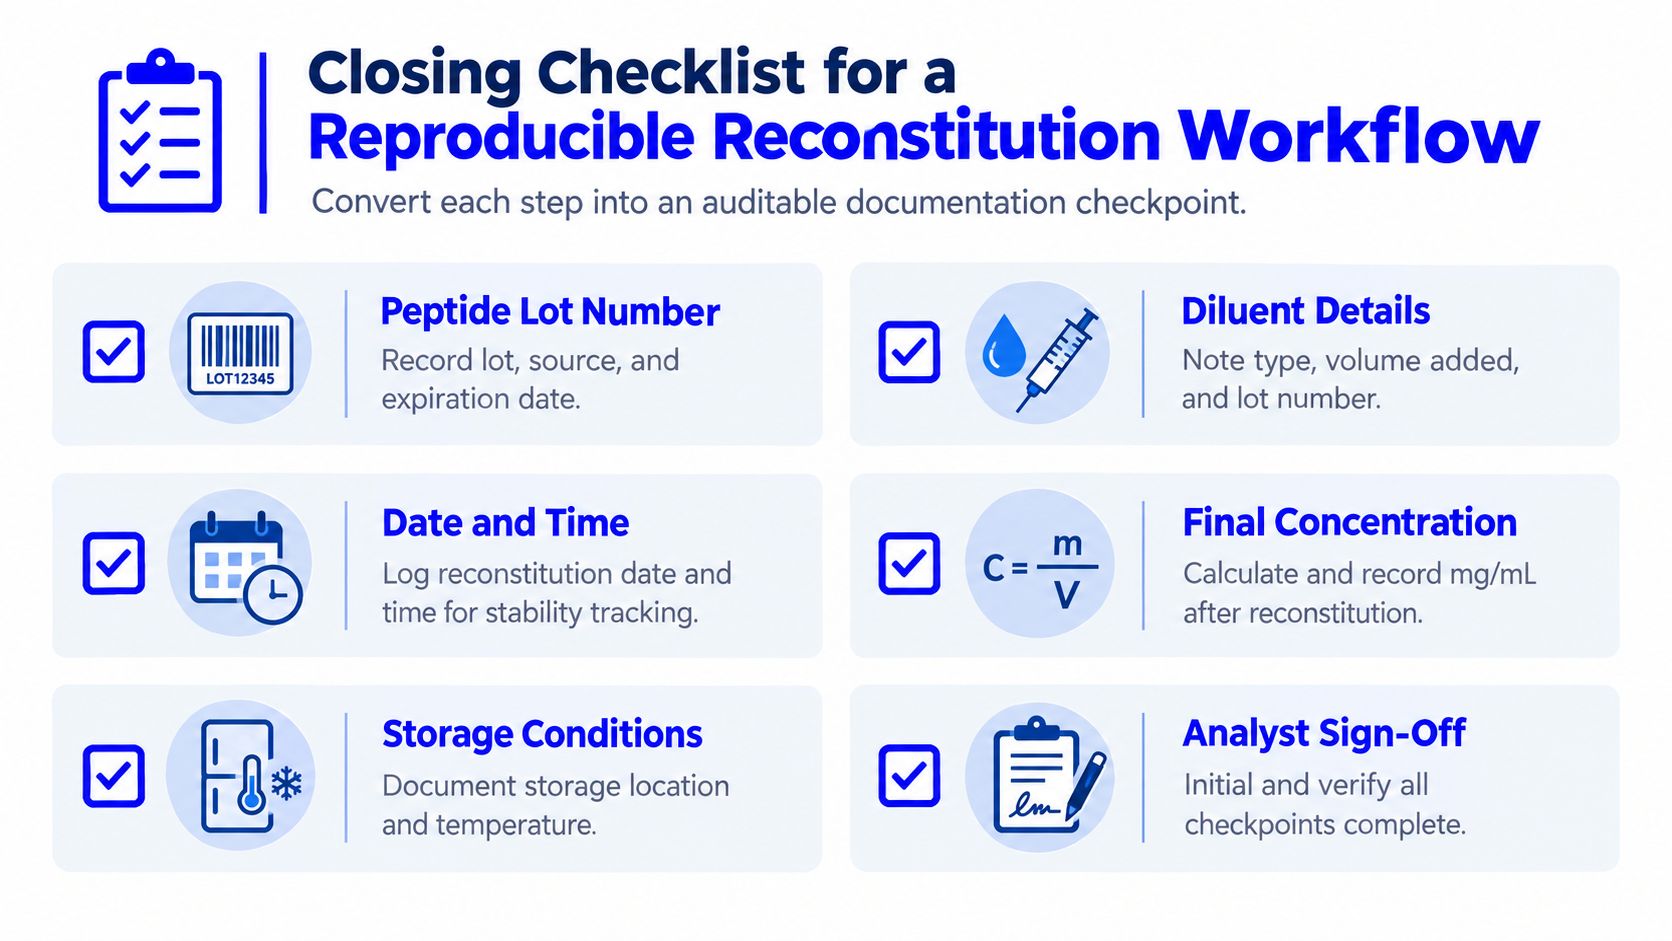
The record links one bench event to every later experiment. If an assay fails, the team can trace the result to the peptide lot, solvent, concentration, handling method, storage location, and visual observation instead of blaming the material without evidence.
The strongest peptide reconstitution steps are deliberately uneventful. The operator selects a compatible solvent, calculates the volume, disinfects carefully, wets the vial wall slowly, mixes gently, stores consistently, and leaves a complete record for the next person.
Herbilabs supplies sterile, non-pyrogenic bacteriostatic water and reconstitution solutions in multiple vial formats for research workflows involving peptides, proteins, antibodies, and other lyophilized materials. Visit Herbilabs to review the available diluent options and supporting documentation before standardizing the next reconstitution session.