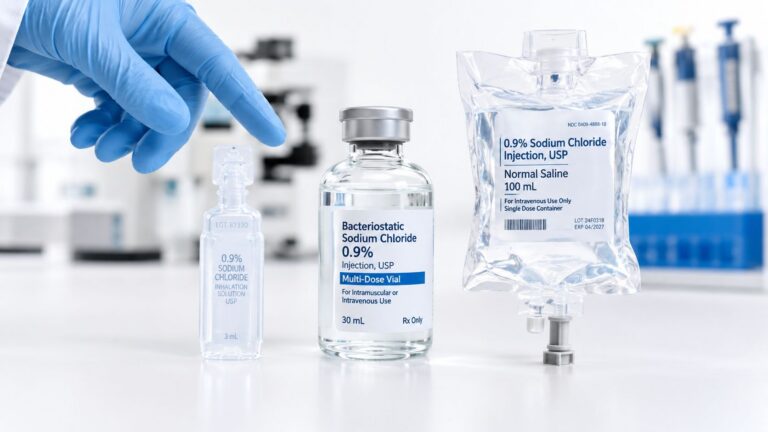
Private Label, White Label, Wholesale partnerships available - EU, USA and UK - Free shipping from €75

Empty Glass Vial Selection Guide for Labs 2026
A peptide reconstitution run often starts with an apparently simple choice: an empty glass vial, a diluent, and a lyophilized material that needs to become a consistent working solution. The pressure is familiar. The vial must fit the planned volume, tolerate repeated withdrawals, arrive intact, and come with enough documentation for another scientist to reproduce the preparation later.
That choice affects more than storage. The container contacts the solution directly, while the stopper and seal determine how the vial behaves during access, transport, and storage. For research-use-only workflows involving peptides, proteins, antibodies, or other aqueous preparations, the right selection balances glass chemistry, vial format, closure performance, sterility controls, and traceability.
Table of Contents
- Why Empty Glass Vial Selection Matters for Lab Work
- Understanding Glass Types and Their Laboratory Applications
- Choosing the Right Vial Format for Your Workflow
- Closure Systems and Sterility Options for Multi-Dose Use
- Labeling, Traceability, and Quality Documentation Requirements
- Packaging, Shipping, and Storage Best Practices
Why Empty Glass Vial Selection Matters for Lab Work
A peptide reconstitution workflow can fail before the first withdrawal. The vial may hold the intended volume, yet leave too little room for mixing, fit poorly in the rack, or lack the closure needed for repeated access. For RUO peptide work, selection should start with the planned preparation and handling pattern, not with the lowest unit price.
Once the solution enters the container, the inner glass surface becomes part of the preparation system. Glass chemistry, vial format, stopper design, seal integrity, and documentation all affect how confidently the result can be interpreted. The United States Pharmacopeia classification of pharmaceutical glass uses resistance to water attack as the basis for classification, rather than appearance or nominal volume. A clear vial can therefore be unsuitable if its glass type is unknown or its closure system is poorly specified.
Consider a routine case. A lab receives a lyophilized peptide, adds an aqueous diluent, and plans repeated withdrawals during the working period. The decision matrix should account for the required fill volume, headspace, access frequency, storage temperature, and whether the preparation will remain in one vial or be divided into aliquots. A vial with unsuitable glass resistance, inconsistent dimensions, or a stopper that sheds particles after repeated puncture creates several possible sources of variation.
The result may reflect container interaction, contamination, evaporation, or handling differences instead of the peptide itself. That ambiguity is expensive to resolve after testing has started.

Reproducibility starts with the container
Two operators can follow the same reconstitution instruction and still produce preparations supported by different evidence. One may use a molded Type I borosilicate vial with a documented lot, while the other uses a container described only as “clear laboratory glass.” The solutions may look identical, but the records do not establish the same level of control.
For RUO workflows, treat the vial as a controlled component. Record:
- Glass classification: Identify Type I, Type II, or Type III glass. Color and appearance are not adequate substitutes.
- Construction method: Tubular and molded vials can differ in dimensional consistency and may require different consideration during delamination assessment.
- Closure compatibility: Evaluate the stopper, seal, and cap together. Repeated puncture, fit, and extractables all depend on the complete system.
- Lot traceability: Link the vial lot used in the experiment to its purchase and supplier quality records.
- Inspection criteria: Check for cracks, chips, dimensional defects, visible particles, and damaged packaging before use.
Practical rule: If the vial choice cannot be explained in the batch record, it has not been fully qualified for a sensitive reconstitution workflow.
Glass lamellae, thin interior fragments that may be difficult to see, also require attention during qualification. Risk can relate to higher-heat processing of tubing-manufactured vials, alkaline formulations or certain buffers, prolonged contact, and terminal sterilization. Visual inspection alone cannot establish compatibility. Supplier qualification, incoming controls, appropriate glass selection, and formulation-specific evaluation provide stronger support.
Volume is only one selection variable
Capacity answers only whether the solution fits. The better question is which vial and closure combination provides documented compatibility, practical access, suitable storage performance, and traceability for the planned RUO preparation.
Specify the container before the experiment begins. Include the solution, working volume, expected withdrawals, storage conditions, closure requirements, and records needed for review. This prevents a common procurement error: selecting a familiar or inexpensive vial first, then trying to justify it after an unexpected result.
Understanding Glass Types and Their Laboratory Applications
A vial can look suitable on the bench yet still be a weak choice for peptide reconstitution. Glass type, color, wall performance, and the closure finish affect how well the container supports an aqueous RUO preparation and its quality records.
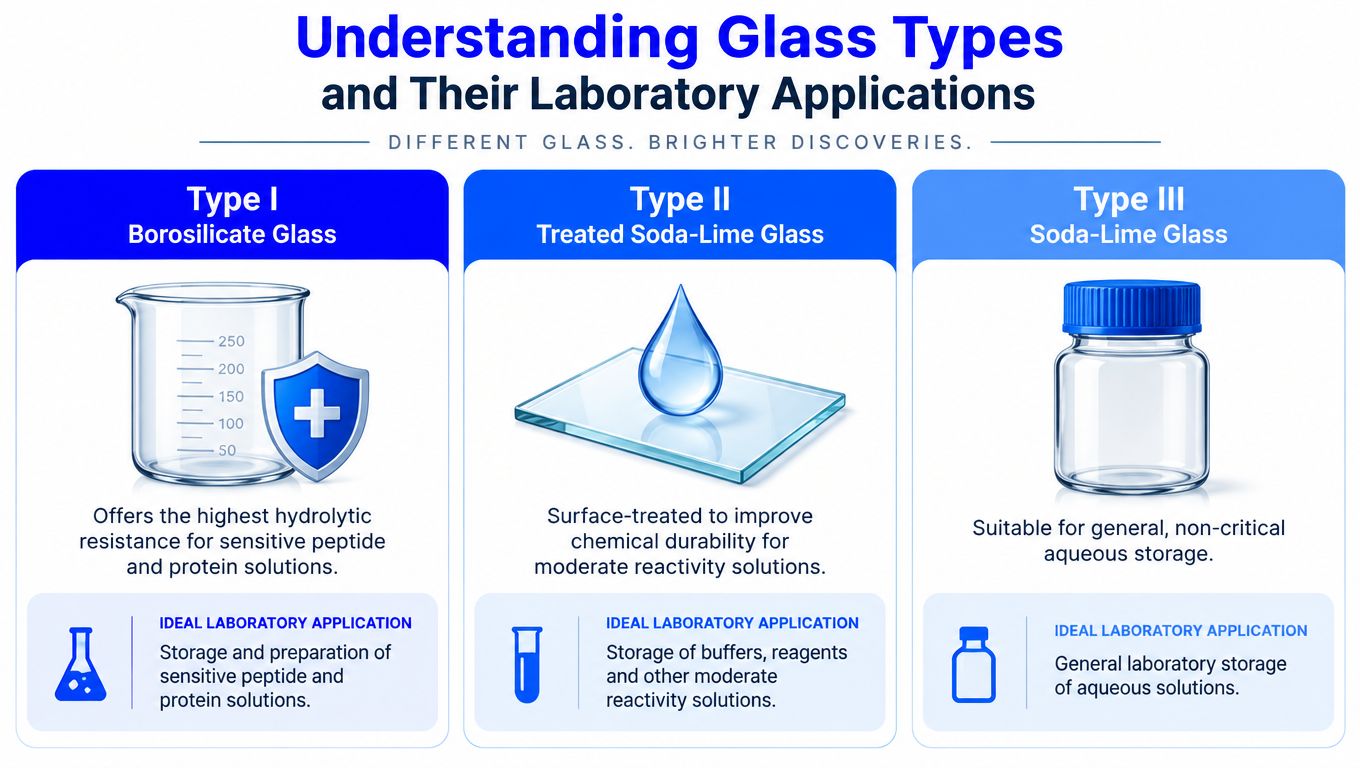
Comparing Type I, Type II, and Type III glass
Glass classification reflects hydrolytic resistance, meaning resistance to attack by water. The three principal types carry different implications for routine laboratory use.
| Glass type | Typical composition | Practical laboratory interpretation |
|---|---|---|
| Type I | Usually borosilicate glass | High hydrolytic resistance and high thermal-shock resistance. A conservative starting point for aqueous peptide, protein, antibody, and injectable-adjacent RUO preparations. |
| Type II | Usually treated soda-lime-silica glass | Often suitable for acidic and neutral aqueous products when the supplier documents compatibility with the intended formulation. |
| Type III | Usually untreated soda-lime-silica glass | Lower hydrolytic resistance. Usually a poor default for sensitive aqueous preparations or powders for injection unless stability data support its use. |
As noted in the selection-matters section above, classification does not depend on whether a vial is clear, amber, large, or small. Type I borosilicate glass is commonly selected for aqueous research solutions because its resistance can limit the release of soluble glass constituents into the formulation.
Why Type I is the usual RUO baseline
For peptide reconstitution, Type I provides a sensible baseline, not a complete compatibility assessment. The formulation still determines the risk profile. Review pH, buffer composition, contact time, temperature, sterilization exposure, visible particulates, extractables, leachables, and container-closure integrity before qualifying the vial.
Type I also tolerates thermal transitions better than lower-resistance glass. That matters when the workflow includes depyrogenation, sterilization, refrigerated storage, or transport. Thermal-shock resistance does not prevent breakage, so packaging, handling, and incoming inspection remain part of the selection decision.
Type II can work for a defined aqueous application when the supplier provides a clear specification and the formulation has suitable compatibility support. Its similar appearance is not evidence that it performs like Type I. Type III should not be treated as interchangeable with borosilicate glass.
Clear or amber glass
Clear glass makes it easier to inspect fill appearance and visible particles. Amber glass reduces light transmission and can suit light-sensitive compounds, but its darker wall makes visual inspection less direct.
Selection principle: Choose amber glass for a documented light-protection need, not because the color signals higher quality.
A useful procurement specification names the glass type, color, dimensional drawing, neck and wall tolerances, closure finish, inspection expectations, and applicable conformity requirements. Laboratories comparing sterile options can find sterile glass vials for peptide use and check those details against the actual reconstitution method.
Choosing the Right Vial Format for Your Workflow
The right format follows the access pattern, not the largest possible fill. A vial that is oversized for a small preparation can increase headspace and make the workspace less efficient, while a container that is too small can complicate mixing, needle entry, and repeated withdrawals.
Four formats commonly appear in RUO peptide workflows: 3 mL, 10 mL, 20 mL, and 30 mL. Each can be useful when matched to the preparation plan.
Start with the reconstitution pattern
A small 3 mL vial suits high-value materials that require a compact working volume or multiple small aliquots. The format can also simplify organization when each preparation needs a clearly separated container. Its limitation is practical rather than chemical. Small internal dimensions can make swirling, inspection, and needle positioning less forgiving.
A 10 mL vial is often a balanced option for routine working solutions. It gives the operator more room for controlled withdrawal while avoiding the unnecessary footprint of a larger container. It can work well where the preparation requires repeated access but doesn't need substantial working volume.
The 20 mL and 30 mL formats are better suited to larger working solutions, pooled preparations, or workflows where a single container reduces the number of transfers. Their additional capacity can improve handling, but it doesn't automatically improve stability. A larger vial should only be selected when the solution volume and access plan justify it.
Match format to handling demands
A simple decision sequence helps:
- Define the actual preparation volume. Include the diluent volume and the amount needed for planned withdrawals.
- Map the access pattern. Distinguish a single withdrawal from repeated access over the in-use period.
- Check equipment fit. Confirm that the vial works with the laboratory's racks, needle assemblies, pipettes, and transport carriers.
- Review headspace and mixing. Leave enough physical room for controlled reconstitution without choosing a container that is unnecessarily large.
- Standardize where practical. Fewer formats simplify storage, labeling, training, and incoming inspection.
Multi-pack configurations can support this standardization. A 10×3 mL pack can serve smaller preparations, while a 10×10 mL pack may suit routine working solutions. The value isn't only the quantity in the carton. Standardized packs can make replenishment, shelf organization, and lot tracking easier.
Avoid procurement by habit
Cost-per-use should include more than the vial price. A format that reduces transfers, prevents unnecessary waste, or fits existing equipment may be operationally preferable even if its unit price differs. Conversely, buying a larger vial because it seems more versatile can create avoidable storage and handling problems.
The final choice should appear in the work instruction or preparation record. A useful specification names the format, glass type, closure finish, sterility status, intended use, and acceptance checks. That record turns “the usual vial” into a repeatable component decision.
Closure Systems and Sterility Options for Multi-Dose Use
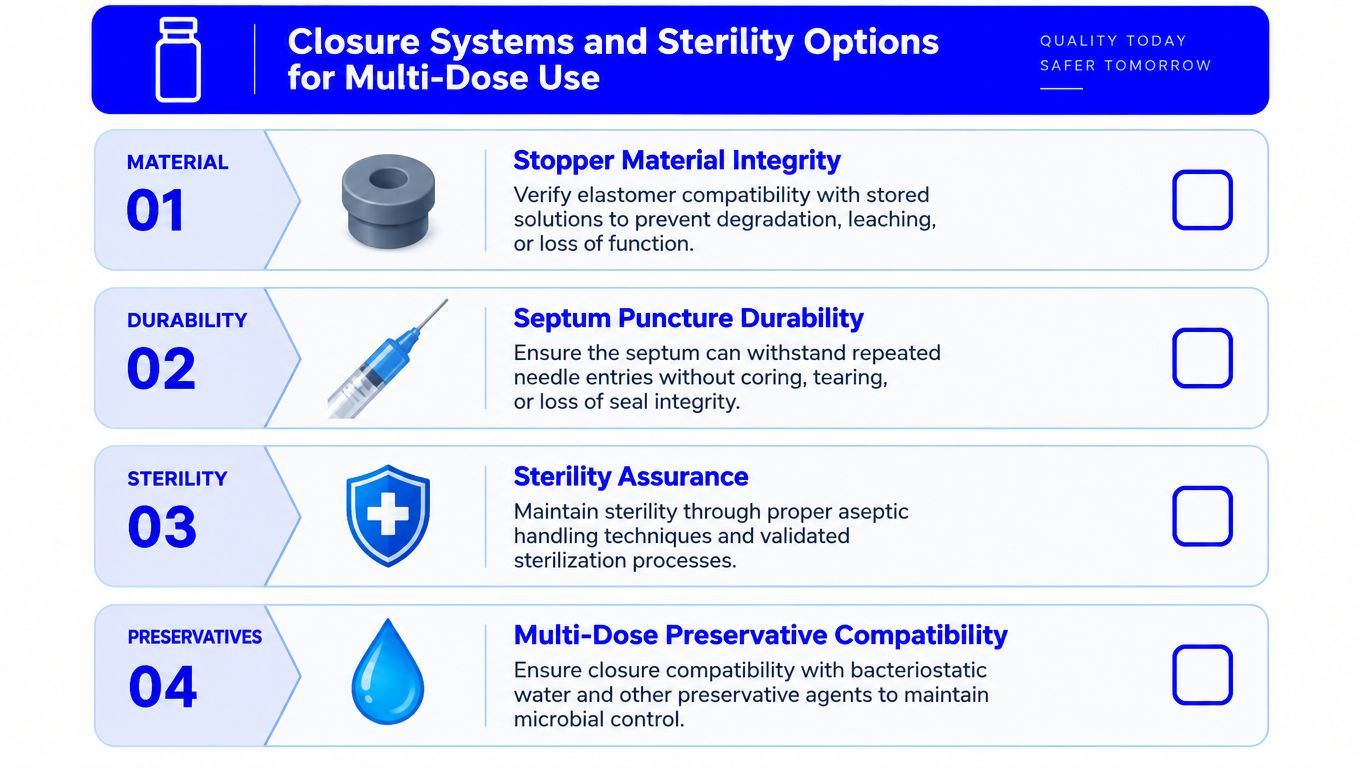
Repeated access changes the risk profile of a vial. A single-use container may need to maintain integrity until one withdrawal, while a multi-dose system must tolerate repeated needle entries without unacceptable coring, leakage, loss of closure integrity, or contamination.
The closure should therefore be qualified as a complete assembly. Stopper material, septum behavior, cap fit, vial finish, sterilization method, and solution compatibility all matter. A well-specified glass container can still fail operationally if the elastomer is unsuitable for the stored solution.
Stopper and septum performance
The stopper material should be compatible with the intended aqueous formulation and sterilization conditions. The laboratory should request component specifications that identify the elastomer, dimensional requirements, coating or treatment where applicable, and relevant compatibility evidence.
Pierceability matters during repeated withdrawals. A septum that resists puncture can encourage poor needle angles or excessive force, while a septum that fragments can introduce particles. The assessment should consider needle gauge, puncture count, operator technique, and the actual access schedule rather than relying on a general statement that the stopper is “multi-dose.”
The cap must hold the stopper securely and maintain the intended seal. Crimp quality, skirt fit, and visible deformation should be included in incoming inspection. A closure can appear intact while still failing a more demanding container-closure-integrity assessment, so supplier documentation should define the applicable controls.
Multi-dose solutions require disciplined access
Bacteriostatic water can support repeated withdrawals when the formulation, closure, storage, and aseptic technique are appropriate. The presence of a preservative doesn't make careless handling acceptable, and it doesn't establish an unlimited in-use period. Laboratories should follow a documented procedure covering disinfection, needle handling, withdrawal technique, storage, and first-puncture dating. Guidance on bacteriostatic water can help teams formalize those controls.
A practical record should include the preparation date, first-puncture date, operator, vial lot, solution lot, storage condition, and defined discard point. If the preparation is used for sensitive research, the record should also identify the reconstituted material and any special light or temperature requirements.
Sterility route and evidence
Terminal sterilization and aseptic filling address sterility through different process strategies. Terminal sterilization exposes the filled container to a validated sterilization process, while aseptic filling relies on controlled preparation, sterilized components, filtration where applicable, and validated aseptic operations.
Neither label alone proves suitability for a specific workflow. The laboratory should ask suppliers for:
- Sterilization method: What process was used, and which components were included?
- Validation evidence: What demonstrates that the process achieves the stated sterility assurance?
- Filter information: If sterile filtration is used, what filter type and process controls apply?
- Closure controls: How are stopper fit, crimping, and integrity monitored?
- Release documentation: What lot-specific records accompany the product?
The FDA's discussion of glass lamellae also supports a broader point. Sterility isn't the only quality attribute requiring control. Vial construction, heat exposure, formulation chemistry, contact time, and terminal processing can influence delamination risk, so the container and closure should be evaluated under realistic worst-case conditions.
Labeling, Traceability, and Quality Documentation Requirements
A vial becomes much easier to defend during a quality review when its identity can be reconstructed without guesswork. The record should connect the preparation to the vial lot, closure components, diluent lot, material identity, operator, and handling dates.
A supplier's lot-specific Certificate of Analysis is useful, but it shouldn't be treated as a complete qualification package by itself. The laboratory should confirm the specific scope of the certificate, verify the document matches the received lot, and check that the stated tests relate to the intended use.
Build a vial qualification record
A practical record can contain:
- Supplier and product identity: Manufacturer, catalogue description, vial format, glass classification, color, and finish.
- Lot information: Vial lot, stopper lot where available, receipt date, quantity received, and storage location.
- Quality evidence: Certificate of Analysis, conformity statement, sterility documentation where applicable, and inspection criteria.
- Incoming inspection: Packaging condition, broken or chipped units, visible particles, dimensional concerns, and closure defects.
- Application decision: Intended formulation, access pattern, storage condition, and any compatibility or aging assessment.
- Disposition: Accepted, quarantined, rejected, or released for a defined RUO workflow.
The record should also state what the vial isn't approved for. A container qualified for a short research preparation shouldn't automatically be released for a different pH range, longer contact period, or more aggressive sterilization exposure.
Label the events that affect interpretation
Labeling should distinguish the original container lot from the preparation event. The working label can include material identity, concentration or preparation description, reconstitution date, first-puncture date, operator initials, storage condition, and discard date. A barcode or laboratory information management system entry can reduce transcription errors, but the underlying fields still need to be defined.
Internal procedures should also clarify whether the laboratory tracks the date of opening, first puncture, first withdrawal, or preparation. Those events aren't always identical. Teams working across jurisdictions can understand AU EU US labeling while adapting the principles to their RUO records and local quality procedures.
Documentation standard: A reviewer should be able to identify what was used, when it was accessed, how it was stored, and which quality records support its release.
Good documentation prevents a later investigation from becoming a reconstruction exercise. It also makes supplier comparisons more objective. A vendor that supplies clear lot records, defined specifications, and consistent release documentation reduces the number of assumptions the laboratory must carry internally.
Packaging, Shipping, and Storage Best Practices
An empty glass vial can meet the technical specification and still arrive unusable. Breakage, damaged closures, compromised outer packaging, temperature excursions, and poor warehouse conditions can undermine the container before the lab performs its first inspection.
The receiving process should begin with the shipping carton, not the vial itself. Staff should record visible damage, check seals and protective packaging, verify the product and lot, and quarantine questionable units until quality personnel decide whether they can be released.
Protect the supply from receipt to use
Vials should remain in their protective packaging until needed. Internal dividers or molded trays reduce contact between units, while sealed secondary packaging helps limit contamination during storage. The storage area should be clean, dry, organized by lot, and managed under defined environmental conditions.
For sterile diluents or temperature-sensitive materials, the shipping qualification should address the actual route and season. The laboratory should confirm dispatch timing, carrier handoffs, temperature monitoring where required, and the procedure for excursions. A supplier that can explain its RUO biologics cold chain logistics gives the receiving team a clearer basis for release decisions.
A storage and distribution review should cover:
- Packaging design: Confirm that the carton protects against impact and prevents vial movement.
- Environmental control: Match storage conditions to the product and closure specifications.
- Transit evidence: Request temperature records or excursion procedures when temperature control is relevant.
- Lot separation: Keep different vial and solution lots distinct in storage and in the laboratory record.
- Fulfillment reliability: Check dispatch schedules, regional delivery capability, and replacement procedures for damaged shipments.
Teams evaluating broader raw material storage solutions should apply the same discipline to small-format laboratory supplies. A storage plan isn't effective if it protects bulk materials but leaves sterile vials exposed to avoidable handling and environmental variation.
The supplier assessment should include manufacturing credentials, quality-system evidence, traceability practices, packaging controls, and customer support. Same-day dispatch can help maintain continuity, but speed doesn't replace documented quality release. The strongest arrangement combines dependable fulfillment with clear acceptance criteria and a defined response to damage or temperature deviation.
Before approving an empty glass vial for peptide reconstitution, the laboratory should confirm four things: the glass type suits the aqueous formulation, the format suits the access plan, the closure supports the intended withdrawals, and the records support traceability. That decision matrix is more reliable than choosing by volume, appearance, or price alone.
Herbilabs supplies sterile RUO diluents and reconstitution solutions in 3 mL, 10 mL, 20 mL, and 30 mL vial formats, with multi-pack, lot-specific documentation, and controlled fulfillment options for peptide, protein, and antibody workflows. Visit Herbilabs to review the available formats and select a documented vial-and-diluent setup that fits the laboratory's reconstitution process.