Private Label, White Label, Wholesale partnerships available - EU, USA and UK - Free shipping from €75

Dilution Series Calculations for Accurate Labs
The stock on the bench is labelled far stronger than the working concentration the protocol wants. One tiny transfer would sit below the pipette's reliable range, so the volume would be easy to mis-set and hard to defend later. Dilution series calculations fix that by repeating one written ratio instead of leaping from stock to target in a single step.
Each fresh tube keeps the same fraction of the previous tube. Think of a colour fade: the next shade is a fixed share of the last shade, not a fixed amount subtracted. Concentrations fall geometrically. A direct dilution uses the conservation equation once and stops. A series multiplies every transfer, so the overall change is the product of those factors.
The bench order is constant step factors, sizing one transfer, cumulative concentration after unlike steps, a full numeric worksheet, how many steps reach a target, then a reporting check. After that, pick a 1:2, 1:5, 1:10 or 1:100 step, write the transfer and diluent volumes, and name the concentration in any tube.
Practical rule: Record the stock concentration, keep mass and volume units identical, and write both volumes before a pipette is picked up.
The maths is the same whether the stock is a solution or a lyophilised material already brought into solution.
Table of Contents
- Why Concentrations Fall in Equal Steps
- Dilution Factors That Stay the Same Each Step
- How to Size One Transfer with C1V1
- Cumulative Concentration After Unlike Transfers
- A Worked Series from Stock to the Last Tube
- How Many Steps Reach a Target Concentration
- How to Check the Result Before You Report It
Why Concentrations Fall in Equal Steps
A labelled stock at 1000 µg/mL and a working level near 1 µg/mL is a thousand-fold gap. Pipetting 1 µL of that stock into 999 µL of diluent is the right arithmetic and a poor physical move. The tip's error is large relative to 1 µL, and a missed droplet changes the tube by a big fraction.
Repeating one comfortable ratio spreads that gap across tubes a standard pipette can fill. Transfer 1 mL and add 9 mL of diluent, and each tube holds one tenth of the tube before it. The drop is geometric, not a subtraction of equal mass at every step. Tube one is not "900 µg/mL less." It is one tenth of the stock. Tube two is one tenth of tube one.
A single direct dilution answers one question: how much stock goes into one final volume. A series answers a chain of questions, and the answer is a product. Miss one factor and every later tube is wrong by that same multiple.
Five checks sit on the worksheet before any liquid moves, and none of them is solved by guessing:
- The step factor that stays the same, written as transfer over total volume.
- The transfer volume for one tube when the target concentration and final volume are known.
- The product of unlike factors when the steps are not equal.
- The concentration named on each tube after equal repeats.
- The step count when the protocol starts from the target instead of the ladder.
What changes afterward is the paperwork, not the chemistry. Circle one ratio, copy its two volumes, and the concentration in any tube is the stock divided by the product of the steps already made.
Dilution Factors That Stay the Same Each Step
A serial dilution keeps one factor at every step, so the concentrations form a geometric series. The San Diego State University biotechnology lab manual defines the dilution factor as the initial sample volume divided by the final volume after diluent is added. The concentration factor is the inverse of that number.
Walk a 1:10 step before looking at the other ratios. Transfer 1 mL of material into 9 mL of diluent. The tube holds 10 mL. The dilution factor is 1/10, or 0.1. That notation means one part in ten total, not one part plus ten parts. Adding 10 mL of diluent to 1 mL would make 11 mL and a different factor.
Repeat the same transfer and the cumulative dilutions are 10^-1, 10^-2, 10^-3 and 10^-4. To name the concentration in a tube, divide the previous concentration by the fold dilution. For each 1:10 step, divide by 10.
Lookup for four common ratios
Circle the row that matches the protocol and copy its volumes onto the worksheet before calculating any tube. Units stay in millilitres so the same ratios can be reused without reconverting.
| Step | Transfer | Diluent | Final volume | Dilution factor | After 3 steps |
|---|---|---|---|---|---|
| 1:2 | 1 mL | 1 mL | 2 mL | 0.5 | 1/8 of stock |
| 1:5 | 1 mL | 4 mL | 5 mL | 0.2 | 1/125 of stock |
| 1:10 | 1 mL | 9 mL | 10 mL | 0.1 | 1/1,000 of stock |
| 1:100 | 1 mL | 99 mL | 100 mL | 0.01 | 1/1,000,000 of stock |
1:2 leaves half the previous concentration, so three repeats leave 1/8. 1:5 uses a factor of 0.2, and 0.2 × 0.2 × 0.2 is 1/125. 1:100 uses 0.01, and three repeats leave one millionth of the stock. The 1:10 row is the one most worksheets already expect: after three steps the tube holds 1/1,000 of the stock.
A 1:10 label is one part in ten total. Write "1 mL + 9 mL" beside it so nobody adds ten parts of diluent.
The concentration factor is what gets multiplied back when a count has to return to the stock. A dilution factor of 0.1 means the material is ten times more concentrated one tube earlier. Keep that pair written on the row that was circled. Later tubes then only need division by the fold, not a fresh volume calculation.
How to Size One Transfer with C1V1
A tube marked 2 mg/mL is only correct if the transfer volume was fixed before the tip touched liquid. The balance is C1V1 = C2V2: C1 and V1 describe the starting material, while C2 and V2 describe the final mixture. Rearranged for the pipette, V1 = (C2 × V2) / C1. Diluent then fills the tube from V1 up to V2, and the written step factor is V1 / V2.
The flow below is the same move drawn left to right, from starting solution through the transfer to the finished mixture.
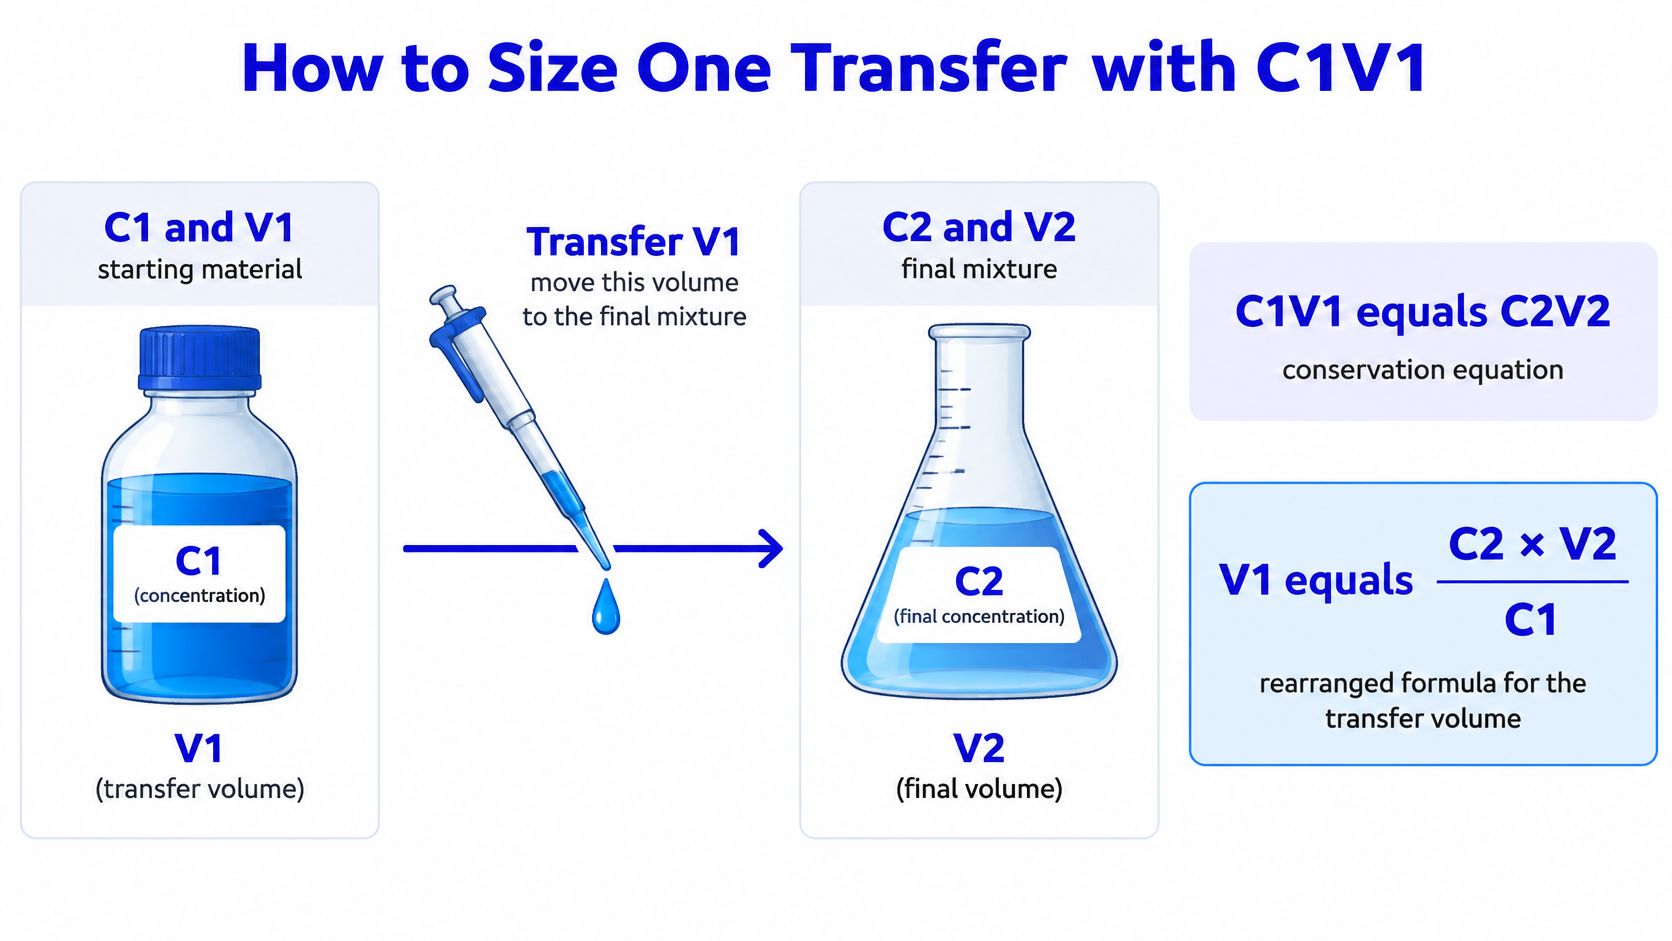
The University of Pennsylvania biology lab manual works one set in that order: a 20 mg/mL starting solution is used to prepare 10 mL at 2 mg/mL, so V1 is 1 mL because 20 mg/mL × 1 mL equals 2 mg/mL × 10 mL, and diluent is the remaining 9 mL. The equation applies to each preparation step when the concentration units match and the volume units match.
Five moves before the tube is labelled
- Write C1, C2 and V2 with units. Leave no blank for "about 10 mL."
- Convert so both concentrations share one unit and both volumes share one unit.
- Compute V1 from (C2 × V2) / C1, keeping digits unrounded on the worksheet.
- Subtract V1 from V2 to get the diluent volume.
- Check that C1 × V1 equals C2 × V2 before the label goes on.
Those five moves apply to every tube in a series. The previous tube becomes the new C1. Nothing about the formula changes. Only the starting concentration does.
If the calculated V1 falls below the pipette's reliable range, do not invent a smaller tip setting. Insert another dilution step so both the transfer and the diluent sit in a range the pipette can deliver, then write that added step factor on the worksheet too. Keep solubility questions separate from concentration maths: a page such as safe acetic acid dilution steps belongs to the solvent check, while C1V1 balances material already in solution.
The clip walks through the same balance with drawn volumes before the next tube is set up.
Try the same 20 mg/mL stock toward 5 mL at 4 mg/mL. V1 is (4 × 5) / 20, which is 1 mL of stock. Diluent is 4 mL. The check is 20 × 1 = 4 × 5.
Cumulative Concentration After Unlike Transfers
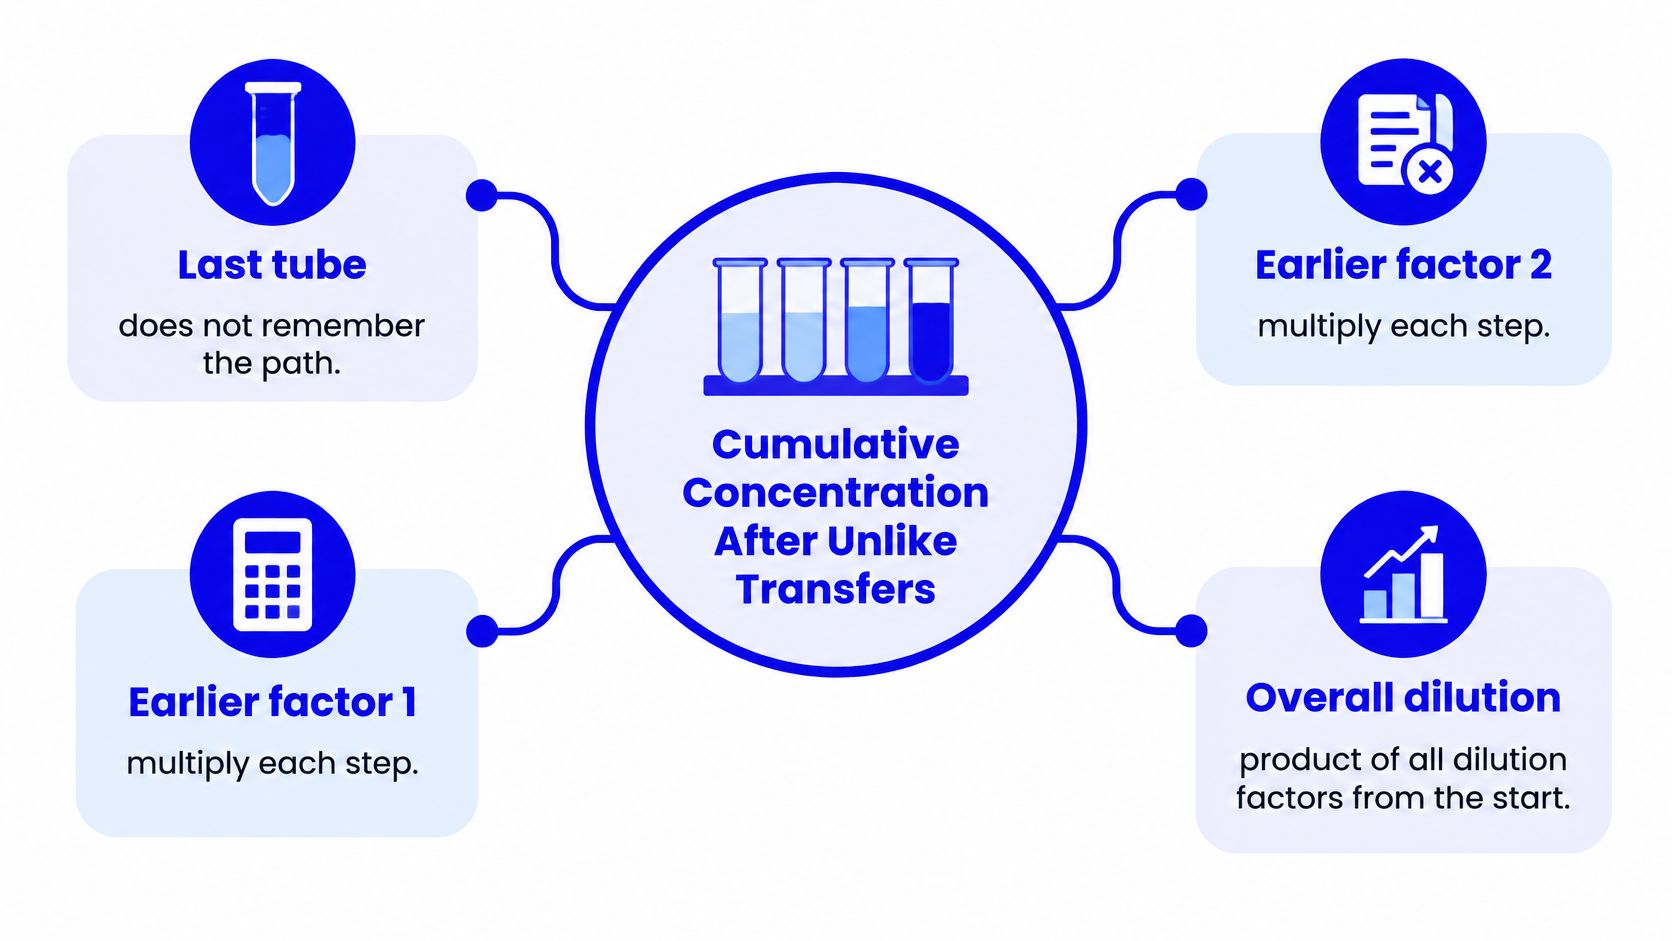
The last tube does not remember the path. Only the written factors do. If the individual dilution factors are multiplied, the product is the overall dilution from the original material. Skipping the middle factor is the usual error, and it scales every later result by that missing number.
The University of Vermont serial dilution notes use a mixed path rather than another equal ladder: a 1:2 sample dilution, a 1:600 tube dilution and a 3:10 plating step. The product is 3/12,000, which reduces to 1/4,000. The original material is therefore 4,000 times more concentrated than the measured final portion. If 200 countable units are observed in that portion, 200 × 4,000 gives 800,000 units per millilitre in the original material.
One product, then the reverse
Write each factor as a fraction. Multiply numerators together and denominators together. Reduce only at the end.
| Transfer | Factor | Running overall dilution |
|---|---|---|
| 1:2 sample dilution | 1/2 | 1/2 |
| 1:600 tube dilution | 1/600 | 1/1,200 |
| 3:10 plating step | 3/10 | 3/12,000 = 1/4,000 |
| Countable units in measured portion | 200 units | 200 x 4,000 = 800,000 units per mL in stock |
The same chain run forward on concentration lands on the count. Start at 800,000 units per millilitre. Divide by 2 to get 400,000. Divide by 600 to get about 666.7. Divide by 10/3, which is the same as multiplying by 3/10, and the result is 200. A plating volume belongs in that product whenever only part of the tube is measured. Leaving it off makes the stock look less concentrated than it is.
The same product rule covers any laboratory series of sequential transfers, even when the steps are not equal. Label the source of every transfer. A row that looks adjacent on a sheet is not automatically the source of the next aliquot.
A Worked Series from Stock to the Last Tube
This worksheet stands on its own. Stock is 1000 µg/mL. Each step transfers 1 mL into 9 mL of diluent, final volume 10 mL, fold dilution 10.
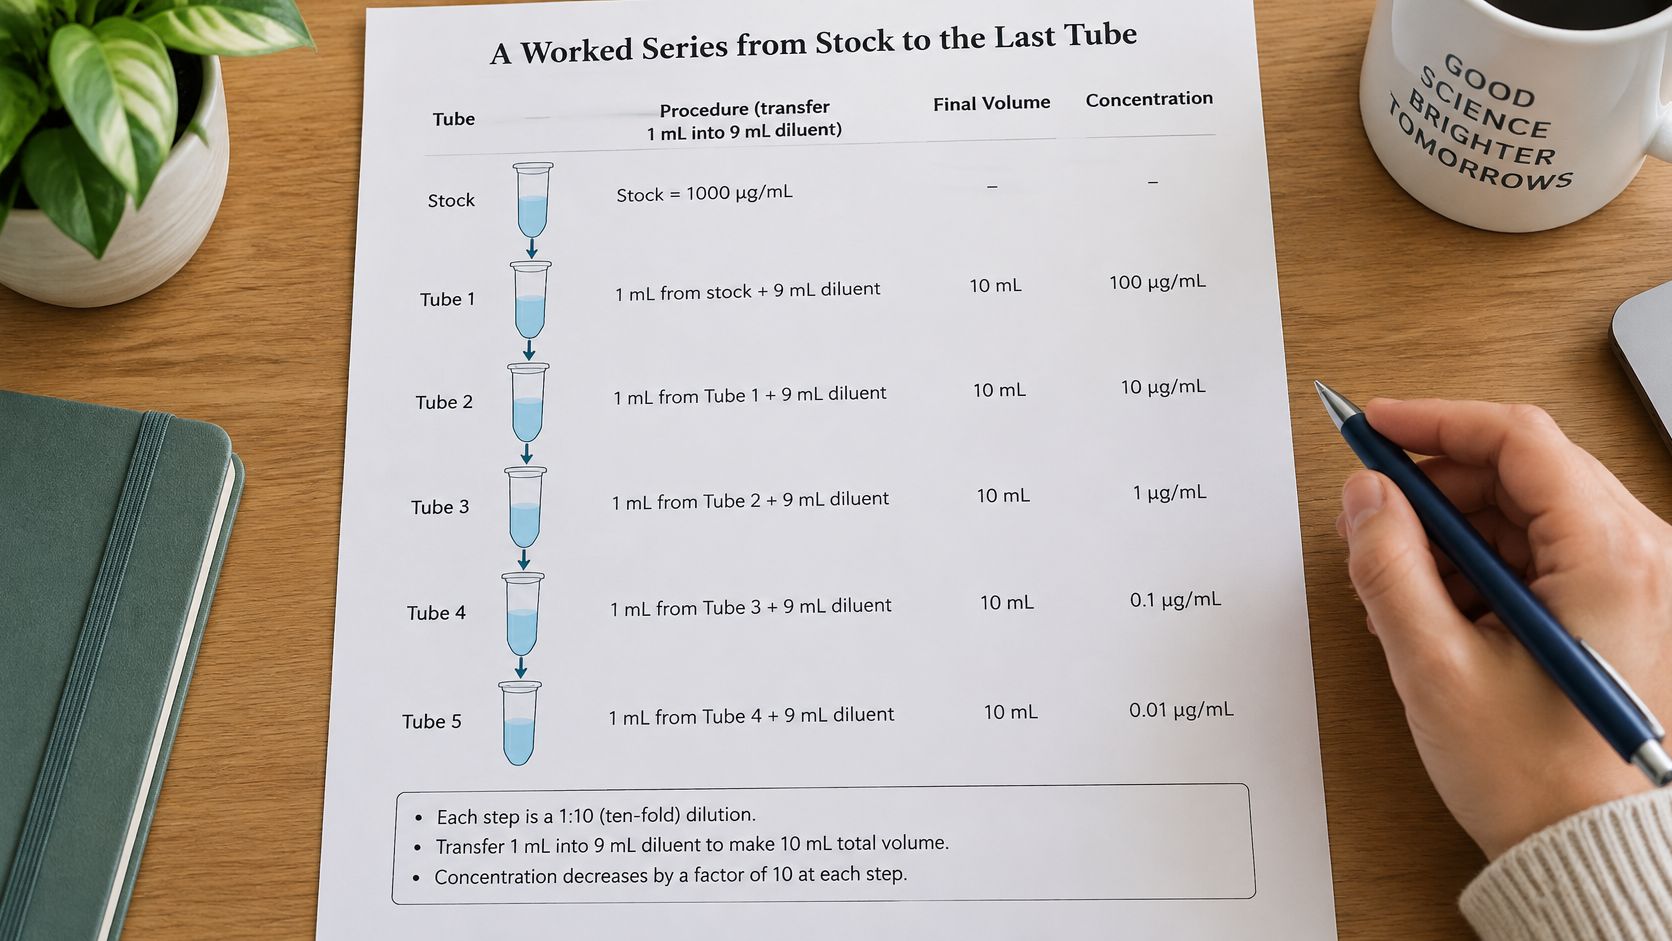
| Tube | Taken from | Diluent | Concentration | Cumulative factor |
|---|---|---|---|---|
| Stock | none | none | 1000 µg/mL | 1 |
| Tube 1 | 1 mL stock | 9 mL | 100 µg/mL | 10^-1 |
| Tube 2 | 1 mL tube 1 | 9 mL | 10 µg/mL | 10^-2 |
| Tube 3 | 1 mL tube 2 | 9 mL | 1 µg/mL | 10^-3 |
| Tube 4 | 1 mL tube 3 | 9 mL | 0.1 µg/mL | 10^-4 |
Pipette order and the reverse check
Mix the source. Transfer 1 mL. Add 9 mL of diluent. Cap, invert until the liquid looks uniform, then use that tube as the next source. Never return leftover liquid to an earlier tube. A returned drop changes the source the worksheet still treats as untouched.
The check inside the series is short. 1000 divided by 10 four times is 0.1. And 0.1 times 10,000 returns 1000. Both routes have to agree before the tubes are filed.
If the working level is 1 µg/mL, stop at tube 3. Tube 4 is not prepared, and diluent for that tube is not drawn. Changing only the stock value scales every row by the same multiplier. Changing the step ratio needs a new table, because every cumulative factor changes.
Relabel the stock as 250 µg/mL and keep the same 1 mL into 9 mL steps. Tube 3 is then 0.25 µg/mL, because 250 × 10^-3 = 0.25. The cumulative factor on that row is still 10^-3. Only the concentration column moved.
How Many Steps Reach a Target Concentration
Start from the target when the protocol names a concentration and the step size is already chosen. Use n = log(C0 / Cf) / log(F), where C0 is the stock, Cf is the target and F is the fold per step (10 for a 1:10 step). The same count can be confirmed with the dilution calculator before a single tube is drawn.
- Match the units on C0 and Cf.
- Divide the stock by the target.
- Take the log of that ratio.
- Divide by log(F).
From 1000 µg/mL to 1 µg/mL at 1:10, log(1000) = 3, so n = 3. From 1000 µg/mL to 0.5 µg/mL, log(2000) / log(10) = 3.30. Round the count up for planning, then set the concentration by multiplying factors. Four equal 1:10 steps would sit at 0.1 µg/mL, under the target. Three equal steps land on 1 µg/mL; add one 1:2 step, 1 mL into 1 mL of diluent, to reach 0.5 µg/mL. Each transfer stays a written factor: 10^-3 × 1/2 is 1/2000, and 1000 × 1/2000 returns 0.5 µg/mL. When the assigned amount is not a clean power of the step, fix the last ratio rather than the count, as the 1:2 step above shows.
How to Check the Result Before You Report It
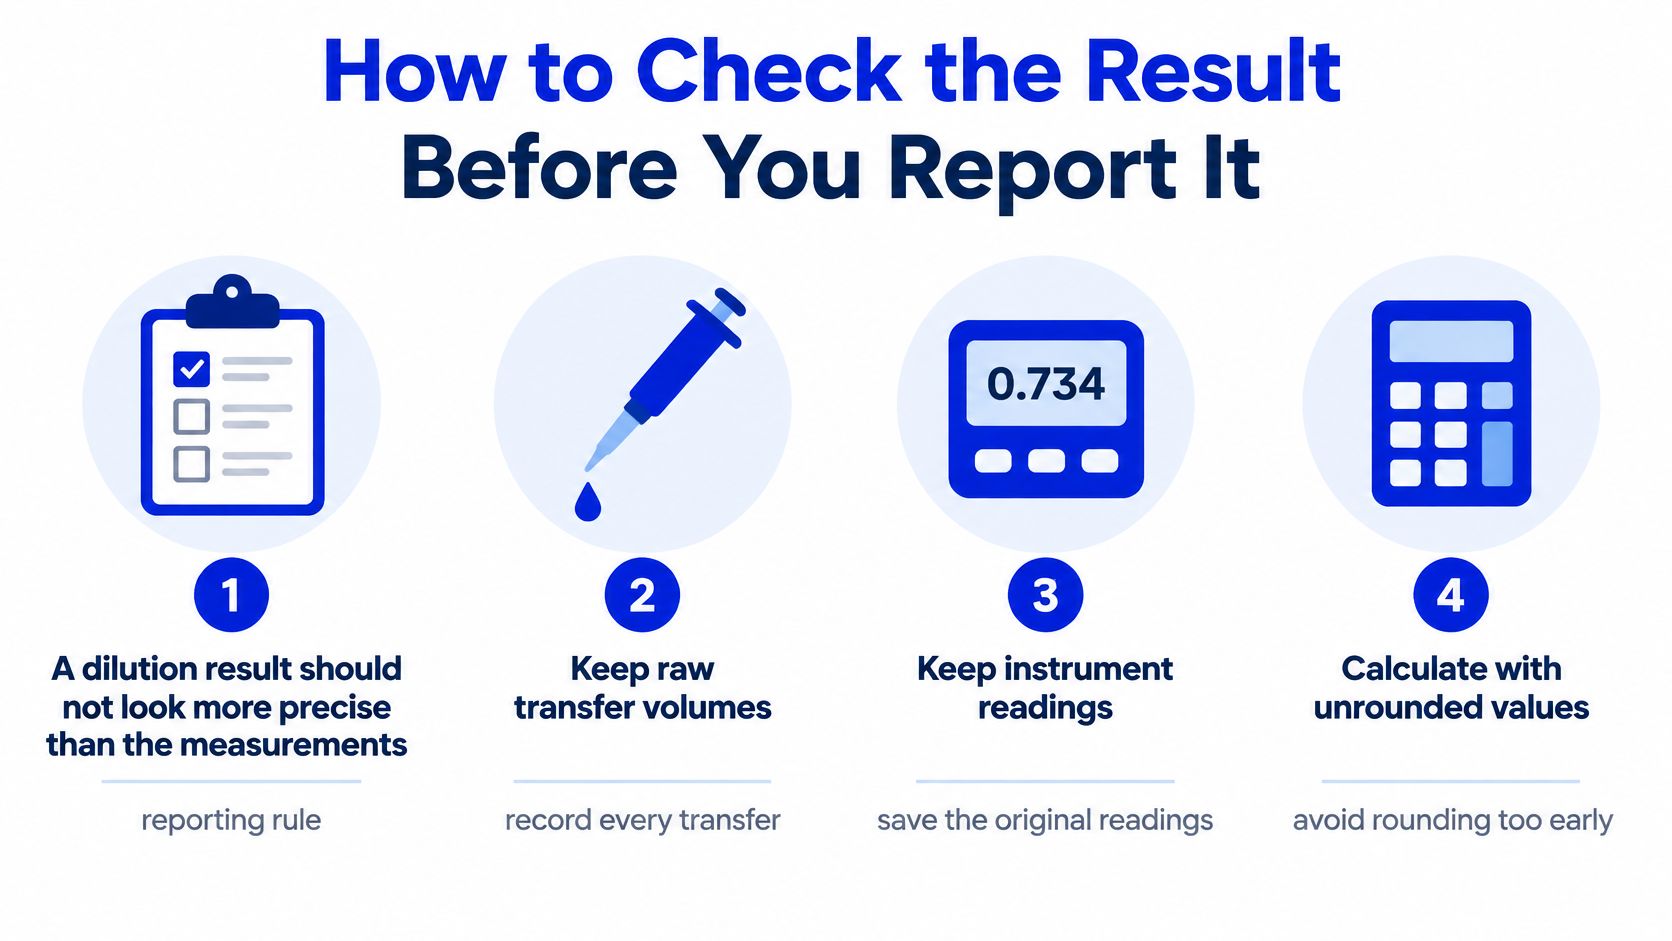
A reported dilution result should not look more precise than the measurements. Keep raw transfer volumes and instrument readings on the worksheet, calculate with unrounded values, and round only the final concentration or dilution factor.
NIST laboratory guidance states that a digit below five leaves the retained digit unchanged, while a digit above five increases it by one. 2.541 rounded to two significant figures becomes 2.5, and 2.453 rounded to two significant figures also becomes 2.5. The same guidance recommends rounding the uncertainty to two significant figures and reporting the measured result to the same decimal place as that uncertainty's least significant digit.
Bench audit before the number leaves the sheet
- Total volume in every factor. The denominator is transfer plus diluent, not diluent alone.
- One concentration unit for the whole sheet. A switch from mg/mL to µg/mL mid-sheet multiplies or divides the result by 1,000.
- Product against the last cumulative factor. The multiplied step factors must equal the factor written on the last tube.
- Reverse multiplication. That factor times the last concentration must restore the stock.
Two failure signs show up often. A last-tube value was rounded at every step and then multiplied, so the error grew with each tube. Or a diluent volume was left blank, so nobody can rebuild the factor. If any check fails, correct the sheet before the series is repeated, and quote only the final rounded value in the report.
After the check passes, file the worksheet with the stock identity, every transfer volume, every diluent volume, the cumulative factor and the final rounded value, with the raw unrounded total beside it. Total the diluent column across only the tubes that will be made, and prepare extra diluent only when the protocol allows it. The Herbilabs team recommends saving the checked sheet with the lot record so the same factors can be repeated without re-deriving them. Pair that sheet with the 2026 lab QC checklist for researchers so the lot identity, the volumes and the rounded result stay in one place.
Herbilabs supplies reconstitution solution for laboratory research and a free reconstitution calculator that works out how much solution to add and the draw volume for a prepared material. Use the dilution series calculations on this page to name every tube before that solution is measured. Visit Herbilabs to open the calculator and review the research-use vials.