Private Label, White Label, Wholesale partnerships available - EU, USA and UK - Free shipping from €75
Dilute 99 Alcohol to 70 with Exact Volumes
100 mL of 70 percent solution needs 70.7 mL of 99 percent alcohol, with water added to the 100 mL mark. The final mark matters more than a separately measured water pour.
A stock bottle, a measuring cylinder and a batch note can leave a technician facing two apparently similar jobs: making a specified final volume or diluting all the alcohol already measured. Those jobs use different calculations. A reliable way to dilute 99 alcohol to 70 starts by deciding which quantity is fixed, then keeping the arithmetic separate from safe chemical handling.
Table of Contents
- Volumes for a 70 Percent Batch
- How the Dilution Formula Works
- Safe Handling While You Mix
- How to Prepare the Mixture
- Errors That Miss the Target Strength
- Label the Batch and Store It
Volumes for a 70 Percent Batch
The stock alcohol is measured first. Water brings the mixture to its final volume. For a small bench batch, that means measuring the calculated stock amount into suitable measuring equipment, then adding purified water until the mixed liquid reaches the intended mark.
The litre-scale preparation follows the same approach. The published isopropyl alcohol dilution table specifies 707 mL of 99 percent isopropyl alcohol, with water added up to a 1,000 mL final volume. The worked batch sizes below apply the same concentration relationship, with stock measurements rounded for practical presentation.
Stock volumes for 70 percent from 99 percent alcohol
| Final volume | 99 percent alcohol | How to add water |
|---|---|---|
| 100 mL | 70.7 mL | Add water to the 100 mL mark |
| 250 mL | 176.8 mL | Add water to the 250 mL mark |
| 500 mL | 353.5 mL | Add water to the 500 mL mark |
| 1,000 mL | 707 mL | Add water to the 1,000 mL mark |
These are bring-to-volume preparations, not recipes for independently measured alcohol and water portions. Alcohol and water undergo volume contraction when mixed, so their separately measured volumes don't become the combined volume.
The table therefore deliberately gives no measured water-pour column. The space between the stock reading and the final mark describes where the mixture must finish, not how much water must be measured elsewhere.
Practical rule: The final-volume mark belongs to the mixed liquid, not to the water before mixing.
Matching the batch to the equipment
A technician selects a batch that fits the available calibrated vessel and the intended laboratory task. A volumetric flask is the better choice when a protocol specifies a final volume and concentration accuracy matters. A graduated cylinder may suit less exact preparations, but an ordinary storage bottle isn't a substitute for calibrated measuring equipment.
The vessel needs enough usable capacity for mixing without spilling. If stock is measured in separate equipment, transfer losses also need attention. Alcohol left coating a measuring vessel hasn't entered the batch, even if it appeared in the original reading.
Throughout these calculations, percent means volume per volume, commonly written v/v, under the temperature conditions relevant to the label and measuring equipment. A weight-percent label requires a different approach. The alcohol name must also remain explicit: matching arithmetic doesn't make ethanol and isopropyl alcohol interchangeable materials.
A listed batch can go straight onto the preparation note. An unlisted batch needs the same concentration relationship, rather than an improvised parts ratio.
How the Dilution Formula Works
Dilution conserves the amount of alcohol while changing the total solution volume. The usual relationship is:
C₁ × V₁ = C₂ × V₂
Here, C₁ is stock concentration, V₁ is stock volume, C₂ is target concentration and V₂ is final solution volume. Both concentrations must use the same basis, and both volumes must use matching units.
When the final volume is fixed
Rearranging gives:
Stock volume = target percent × final volume ÷ stock percent
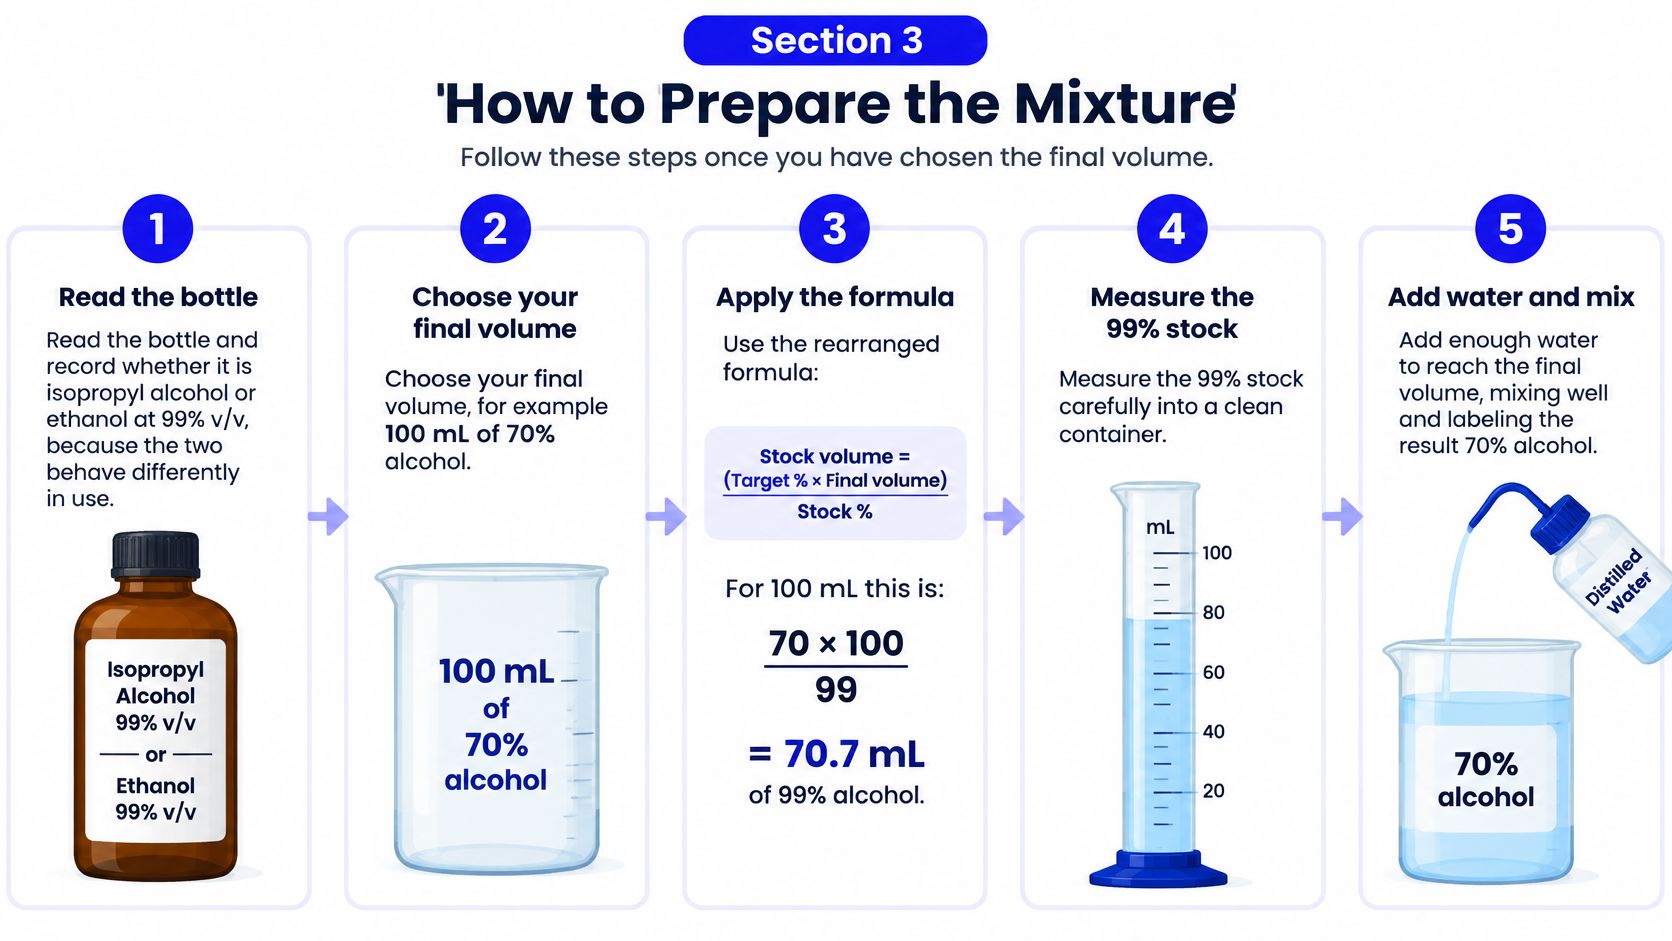
For the small-batch example, the calculation is 70 × 100 ÷ 99 = 70.7 mL, rounded. The alcohol-dilution calculator example likewise specifies 70.7 mL of stock, with water added to reach 100 mL.
As a separate worked check, applying the same equation to a litre-scale final volume gives 70 × 1,000 ÷ 99, rounded to 707 mL. These rounded measurements are practical preparation values, not claims of unlimited analytical precision.
When the stock amount is fixed
Using an entire measured stock quantity is a different calculation:
Estimated water volume = stock volume × (stock percent ÷ target percent − 1)
For the stated concentrations, the multiplier is approximately 0.4143. The fixed-stock dilution example gives 414.3 mL of water for 1 litre of 99 percent alcohol, producing an estimated 1.414 litres.
That estimate treats volumes as additive. It doesn't correct for contraction, so filling to a final mark is preferable whenever the protocol specifies final volume.
The calculation doesn't establish chemical-handling safety. The handling checklist keeps those responsibilities separate.
A different printed stock strength must replace the stock percentage in the equation. The familiar multiplier isn't transferable to a differently labelled bottle.
The bench guide for small research labs provides broader calculation context. For readers encountering application-specific concentration discussions, 60% alcohol hand sanitizer effectiveness concerns a separate application, not a laboratory preparation specification.
Before pouring, the technician records both stock volume and final volume on the preparation note.
Safe Handling While You Mix
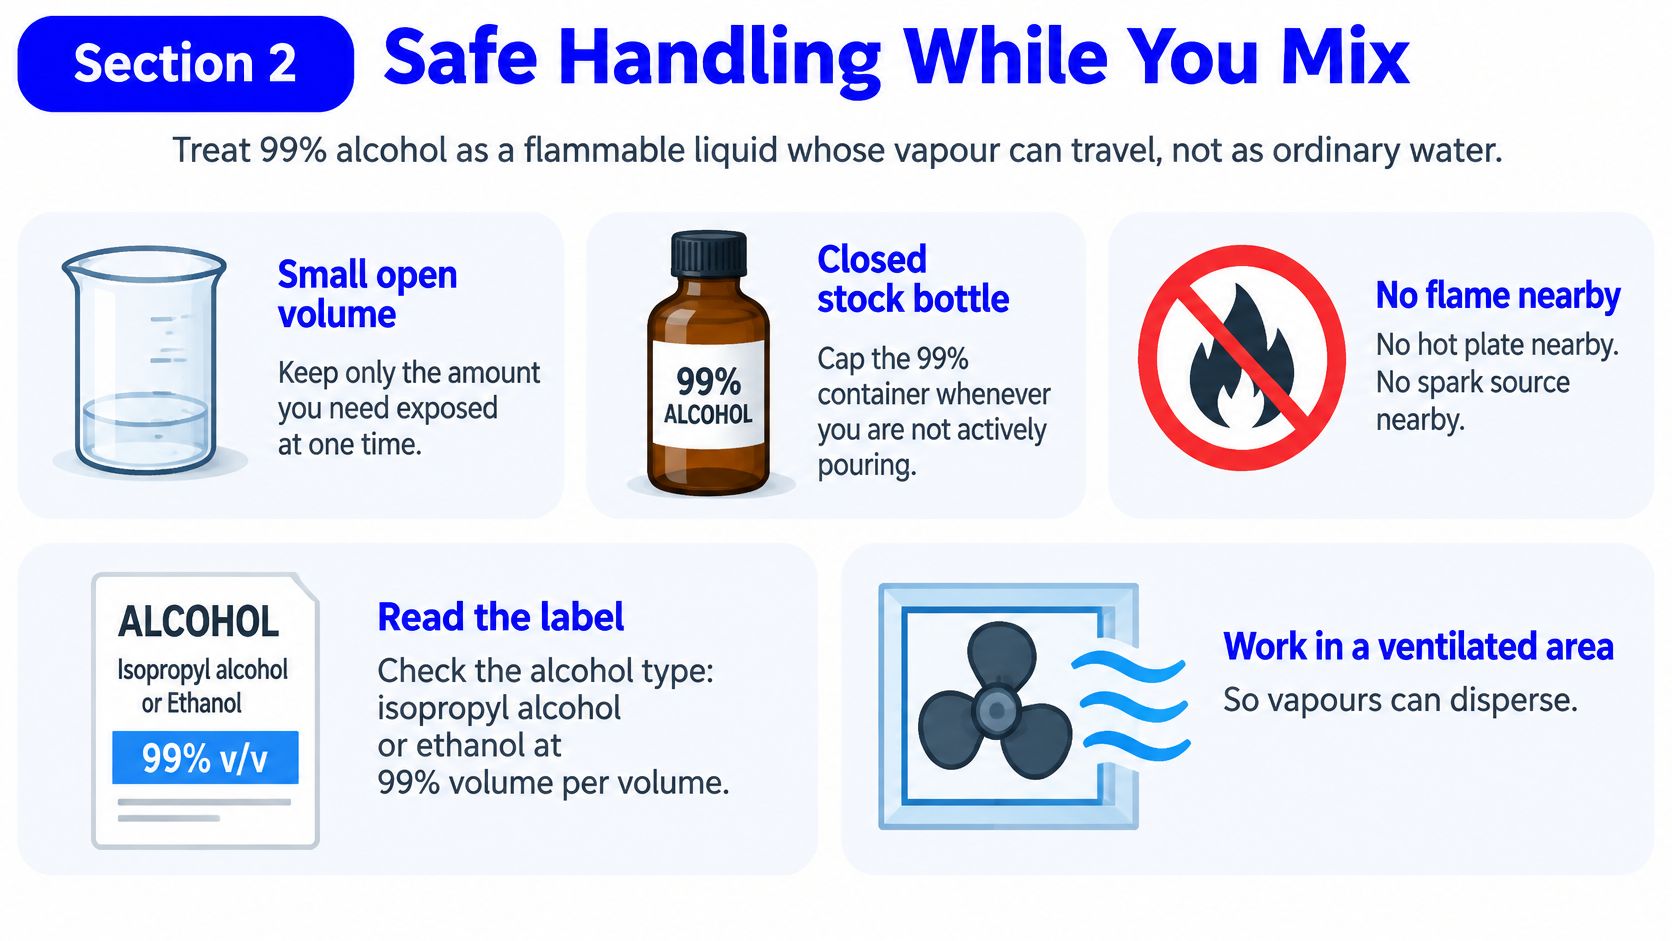
An open alcohol bottle requires an ignition-source check before any measurement begins. Concentrated alcohol is a flammable liquid, and its vapour can move away from the immediate pouring point. A clear patch of bench isn't enough if a nearby flame, hot plate or sparking device remains in operation.
The stock bottle stays capped whenever it isn't actively being used. Only the amount needed for the current preparation remains exposed, and pouring takes place in suitable ventilation. Where vapour control is needed, the appropriate equipment is a chemical fume hood, not an enclosure assumed to handle solvent vapour.
Conditions that stop the preparation
- Missing eye protection: Splash goggles belong in place before either liquid is transferred.
- Unsuitable gloves: Glove compatibility must match the named alcohol and anticipated contact, using the safety data sheet and glove manufacturer's compatibility information.
- Uncontrolled ignition sources: Flames, hot surfaces and spark sources must be removed or the work relocated.
- Poor ventilation: The setup needs correction before the bottle opens.
- Damaged containers: Softened, cracked or crazed plastic must not hold the mixture.
Mouth pipetting is never acceptable. A compatible pipette aid or suitable measuring vessel keeps transfers controlled without that exposure route.
The preparation sequence below assumes those bench conditions have already been checked.
Heat, spills and storage compatibility
Mixing may produce warmth. Water is added gradually with controlled mixing, and a freshly mixed warm vessel isn't tightly sealed until the liquid has cooled. The vessel must remain supervised and protected from ignition sources during that pause.
For a spill, the technician follows the site's solvent-spill procedure and the safety data sheet. Ignition sources stay away, ventilation remains appropriate, and only trained personnel handle a small spill with suitable absorbent. A large spill, strong vapour or uncertain conditions requires evacuation and the site's emergency response, not improvised wiping.
A calculation can be correct while the pouring setup remains unsafe.
Finished solution belongs in compatible glass or supplier-rated plastic, closed and upright, away from heat and oxidisers. The stock remains in its original labelled bottle. The Herbilabs reagent safety tips provide additional laboratory handling context.
This preparation is a laboratory chemical dilution. It doesn't establish suitability for any other application.
How to Prepare the Mixture
A prepared bench needs a clean calibrated vessel, suitable stock-measuring equipment, purified water and a batch note. Eye protection, ventilation and ignition control remain in place throughout the transfer.
The sequence separates choosing the correct material, measuring it and setting the final volume. It also leaves a record another laboratory worker can check without reconstructing the arithmetic.
Preparation sequence
Read and record the stock label. The technician confirms whether the bottle contains isopropyl alcohol or ethanol and whether its concentration is stated by volume. The arithmetic may match, but the material identity on the finished label must match the actual bottle.
Write the batch quantities. The target final volume and calculated stock volume go onto the same preparation note. Keeping those fields separate prevents a stock measurement from being mistaken for a finished-volume instruction.
Select the measuring vessel. A suitable volumetric flask provides a defined final mark. A graduated cylinder is an alternative where the laboratory procedure accepts its measurement uncertainty. Purified water is placed ready as the diluent.
Measure and transfer the stock. The alcohol is measured carefully, with the scale read at eye level. Any separate transfer follows the laboratory's established method so unaccounted liquid isn't left behind.
Add water in portions and mix. Gentle swirling distributes the water without unnecessary splashing. Addition pauses if the liquid becomes warm.
Allow temperature to settle, then approach the mark. Cooling matters because a warm liquid occupies a different volume from the same liquid after it cools. Near the final mark, a compatible dropper or pipette allows controlled additions without overshooting.
Close and homogenise the batch. Once the final volume is set, the flask is stoppered and inverted repeatedly so liquid in the neck joins the bulk mixture. A cylinder requires an appropriate mixing and transfer method rather than an improvised hand seal.
Label before storage. The finished container receives the alcohol name, target concentration expressed as v/v, preparation date and stock lot. The final volume also belongs on the batch record and, where useful, the container label.
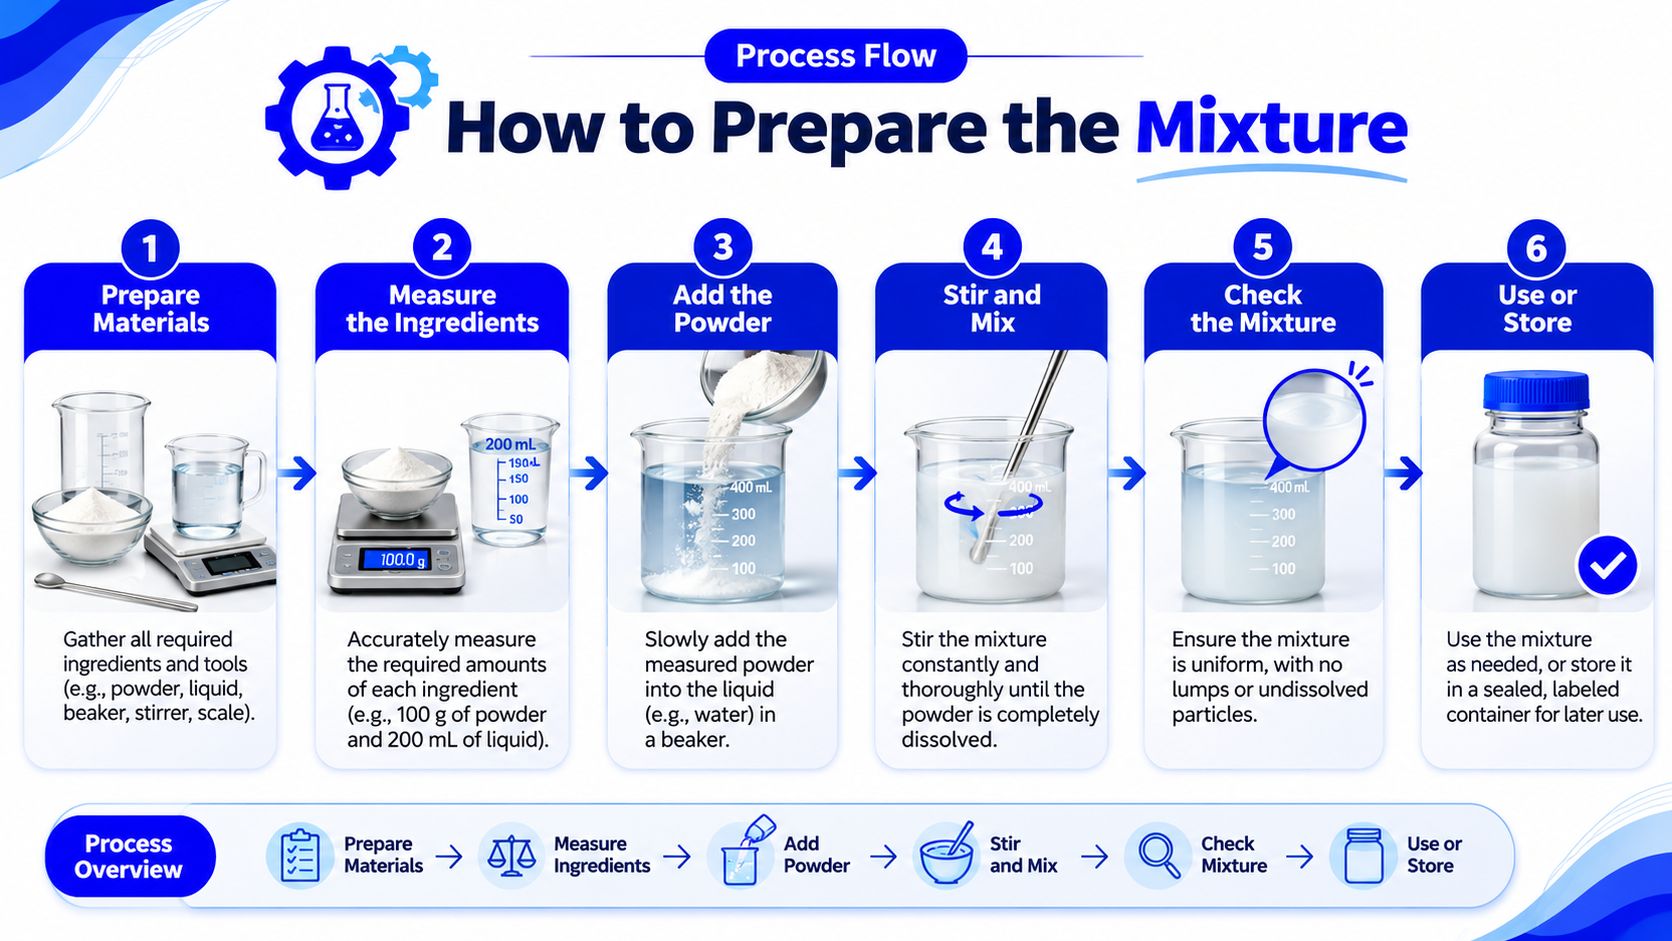
The process diagram provides a visual reminder of the transfer and mixing sequence.
The final record check
The calculation sheet stays with the container until the label has been checked against it. A loose scrap removed too early can separate the only preparation record from an otherwise anonymous bottle.
A usable label identifies the contents without reopening the container. Alcohol identity, concentration basis, preparation date and stock traceability must remain legible after routine bench handling.
Errors That Miss the Target Strength
Two parts stock alcohol plus one part water isn't an exact substitute for a calculated dilution. The DailyMed alcohol label describes adding one part water to two parts 99 percent alcohol to make a standard 70 percent solution. However, under simple additive-volume arithmetic, 99 × 2 ÷ 3 = 66 percent, not the stated target.
That calculation doesn't predict the exact contracted mixture. It does show why a remembered parts instruction shouldn't replace a controlled final-volume preparation.
Dilution errors and the correction
| Error | What it does | Correction |
|---|---|---|
| Two parts 99 percent alcohol plus one part water | Gives about 66 percent under additive-volume arithmetic | Calculate stock volume and bring the mixture to its final mark |
| Pouring the volume gap as water | Ignores contraction | Measure stock, then fill to the mark |
| Treating a weight percent label as volume percent | Changes the alcohol amount | Confirm the label says v/v |
| Filling while the mix is warm | Volume drops on cooling | Cool, then adjust to the mark |
| Using the 99 percent factor on 91 percent stock | Finished mix is too weak | Recalculate with the printed strength |
Checking a questionable batch
A batch made from memory needs its starting ratio checked first. Without recorded quantities, a technician can't assign a trustworthy concentration merely because the mixture looks normal.
Dirty measuring equipment introduces a separate problem: residue can contaminate the batch or interfere with a clean reading. For a clear liquid with a concave meniscus, the bottom of the curve is read at eye level. A fixed reading error matters more proportionally in a small preparation.
Record check: A familiar recipe isn't evidence that the bottle contains the labelled concentration.
Correction starts with the actual stock label and preparation record. If those records can't support the claimed strength, the batch shouldn't be filed as a verified preparation.
Label the Batch and Store It
Before storage, the technician checks alcohol identity, target v/v concentration and final volume against the preparation note. Back-calculation uses stock concentration multiplied by stock volume, divided by final volume. Small rounding differences are expected; a material mismatch needs investigation before the label is accepted.
The closed container stays upright, away from heat and incompatible chemicals, under the laboratory's flammable-liquid storage procedure. Records remain available so another worker can browse storage and handling records rather than infer conditions from the bottle's appearance.
A separate research diluent
Herbilabs's ready-to-use research diluent range is a different material, not a substitute for this alcohol preparation. Reconstitution Solution 10 mL is sterile, non-pyrogenic water containing 0.9% (9 mg/mL) benzyl alcohol as a bacteriostatic preservative, supplied in multi-use glass vials for research use only. The 10 mL vial and 10 x 10 mL kit are in stock for compatible lyophilised material.
Its storage range is 15 to 25 C, and a COA is published for every lot. A 28-day period after first puncture is a common laboratory convention, not a product guarantee. The alcohol batch's final release check remains its own label and preparation record.
Herbilabs team
Herbilabs offers ready-to-use research diluent and laboratory calculation resources, keeping material selection separate from alcohol-dilution maths. Researchers seeking a compatible diluent for lyophilised material can visit Herbilabs to review the available vial formats and lot documentation before preparing a research workflow.